Sunset Ombre Oval Table Mat Free Crochet Pattern
Introduction
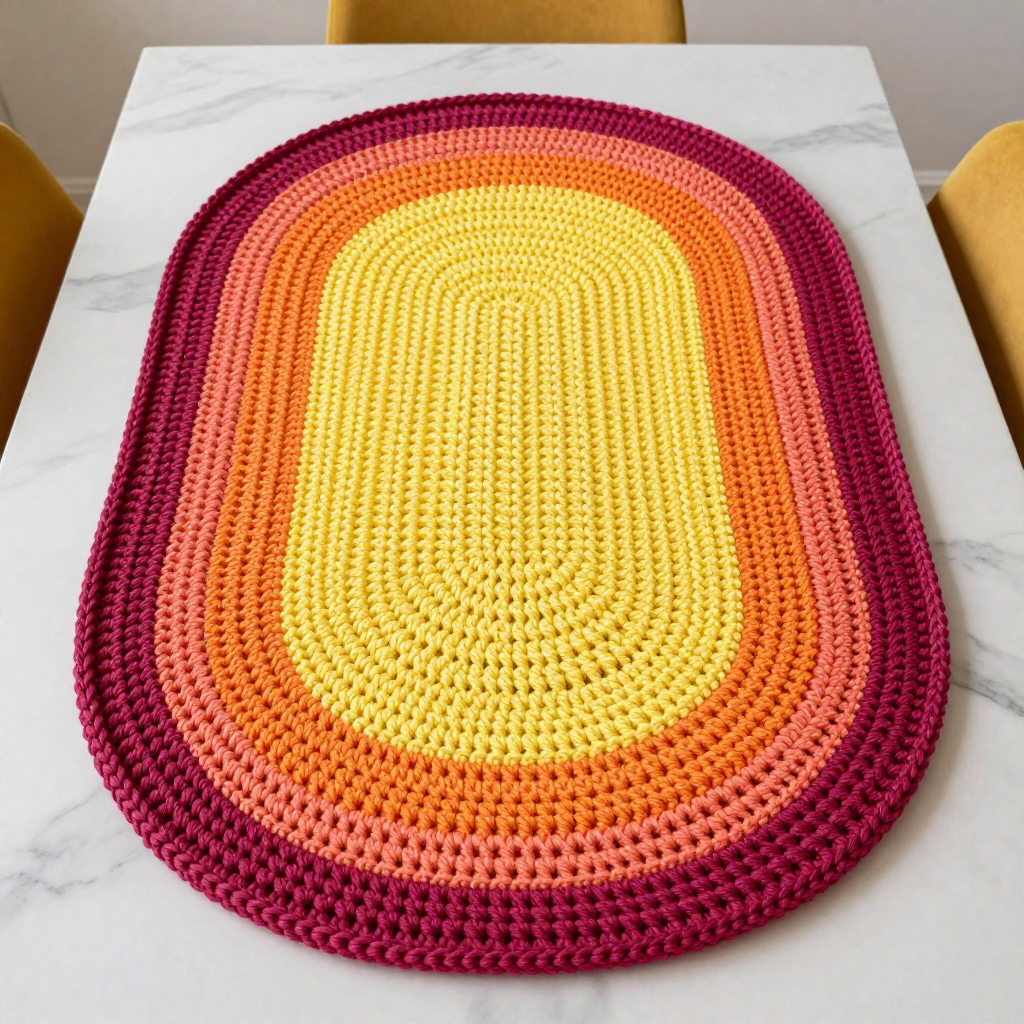
This Sunset Ombre Oval Table Mat is a warm, welcoming project for anyone who has mastered the basic double crochet and wants to make something beautiful for their home. Worked in joined rounds from a starting chain, it grows into a smooth oval with gentle increases at each end, and the four sunset shades blend from sunny yellow through orange and coral to deep magenta. At about 12 by 18 inches, it looks lovely under a centerpiece or a steaming mug, and the worsted cotton gives it a soft, sturdy, washable feel. If you love hygge-style home decor and simple, meditative stitching, this mat is for you.
Materials Needed
- Yarn: Worsted weight (4) cotton yarn — Color A (yellow) 50 yards, Color B (orange) 60 yards, Color C (coral) 60 yards, Color D (magenta) 50 yards
- Hook: 4.0 mm (G-6) crochet hook
- Notions: Stitch marker, tapestry needle, scissors, blocking pins and a spray bottle or blocking mat
- Finished size: Approximately 12 inches wide by 18 inches long
Abbreviations
- ch — chain: make a loop of yarn and pull it through the loop on your hook.
- dc — double crochet: yarn over, insert hook in stitch, pull up a loop, yarn over and pull through two loops, yarn over and pull through the last two loops.
- sc — single crochet: insert hook in stitch, pull up a loop, yarn over and pull through both loops.
- sl st — slip stitch: insert hook in stitch, yarn over and pull through both the stitch and the loop on your hook.
- beg — beginning.
- st(s) — stitch(es).
- [ ] — repeat the instructions inside the brackets the number of times stated after them.
Gauge
16 stitches and 8 rows = 4 inches in double crochet. To check, crochet a small swatch in dc and measure a 4-inch section; if you have more stitches than 16, go up a hook size, and if you have fewer, go down.
Tips Before You Start
- Count your stitches at the end of every round — the oval only stays flat and even if each round matches its stitch count.
- Place a stitch marker in the first stitch of each round so your joins stay straight and you never lose your place.
- Change colors in the last yarn-over of the final stitch of the round before the new color begins, so the color change sits neatly at the join.
- Keep your tension relaxed and even; tight double crochet at the oval ends will make the mat cup instead of lying flat.
Step-by-Step Instructions
Oval Body (worked in joined rounds)
With Color A, ch 31.
R1: 3 dc in 4th ch from hook (counts as first dc + 2 dc), dc in next 26 ch, 5 dc in last ch, turn to work along opposite side of ch, dc in next 26 ch, 3 dc in same ch as beginning, join with sl st to top of beg ch-3. (64 dc)
R2: Ch 3 (counts as dc), 2 dc in same st, 2 dc in next st, dc in next 26 sts, 2 dc in each of next 5 sts, dc in next 26 sts, 2 dc in each of next 3 sts, join. (76 dc)
R3: Ch 3, dc in same st, 2 dc in next st, dc in next st, 2 dc in next st, dc in next 26 sts, [2 dc in next st, dc in next st] 5 times, dc in next 26 sts, [2 dc in next st, dc in next st] 3 times, join. (88 dc)
R4: Ch 3, dc in same st, dc in next st, 2 dc in next st, dc in next 2 sts, 2 dc in next st, dc in next 26 sts, [2 dc in next st, dc in next 2 sts] 5 times, dc in next 26 sts, [2 dc in next st, dc in next 2 sts] 3 times, join. (100 dc)
Change to Color B.
R5: Ch 3, dc in same st, dc in next 2 sts, 2 dc in next st, dc in next 3 sts, 2 dc in next st, dc in next 26 sts, [2 dc in next st, dc in next 3 sts] 5 times, dc in next 26 sts, [2 dc in next st, dc in next 3 sts] 3 times, join. (112 dc)
R6: Ch 3, dc in same st, dc in next 3 sts, 2 dc in next st, dc in next 4 sts, 2 dc in next st, dc in next 26 sts, [2 dc in next st, dc in next 4 sts] 5 times, dc in next 26 sts, [2 dc in next st, dc in next 4 sts] 3 times, join. (124 dc)
Change to Color C.
R7: Ch 3, dc in same st, dc in next 4 sts, 2 dc in next st, dc in next 5 sts, 2 dc in next st, dc in next 26 sts, [2 dc in next st, dc in next 5 sts] 5 times, dc in next 26 sts, [2 dc in next st, dc in next 5 sts] 3 times, join. (136 dc)
R8: Ch 3, dc in same st, dc in next 5 sts, 2 dc in next st, dc in next 6 sts, 2 dc in next st, dc in next 26 sts, [2 dc in next st, dc in next 6 sts] 5 times, dc in next 26 sts, [2 dc in next st, dc in next 6 sts] 3 times, join. (148 dc)
Change to Color D.
R9: Ch 3, dc in same st, dc in next 6 sts, 2 dc in next st, dc in next 7 sts, 2 dc in next st, dc in next 26 sts, [2 dc in next st, dc in next 7 sts] 5 times, dc in next 26 sts, [2 dc in next st, dc in next 7 sts] 3 times, join. (160 dc)
Border Round
R10: Ch 1, sc in same st, sc in each st around, join with sl st to first sc. Fasten off. (160 sc)
Assembly and Finishing
This mat is worked as a single continuous piece, so there is no seaming to do. Weave in all ends on the wrong side, threading each tail through several stitches in its own color band so it disappears. Block lightly to shape: pin the mat to a 12 by 18 inch oval on a blocking mat, mist it with water, and let it dry completely. The single crochet border round gives the edge a crisp, dense finish that holds its shape after blocking.
Pro Tips and Variations
- For a larger mat, continue the increase pattern at the ends for one or two more rounds before the border, adding a fifth sunset shade such as deep plum.
- Swap the cotton for a cotton-blend for a softer drape, or use a 4.5 mm (7) hook for a slightly looser, lacier mat.
- Work the final round in a contrasting cream or ecru for a crisp frame that makes the sunset stripes pop.