Ribbed Alpine Panel Sun Hat Free Crochet Pattern
Introduction
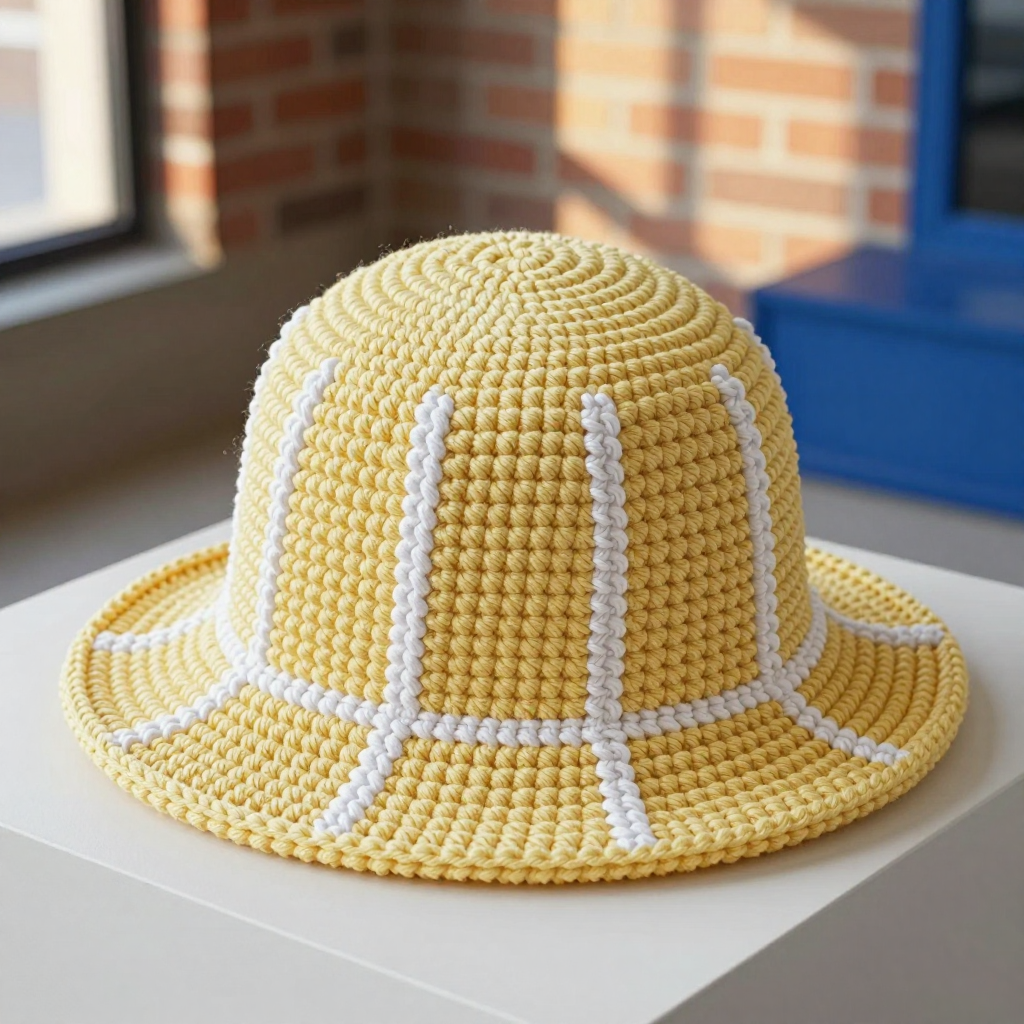
This ribbed alpine panel sun hat is a cozy, textured hat designed for men who like a clean, structured look with a little visual interest. Worked top-down in bulky wool, it features a flat crown, a straight cylindrical body in raised alpine stitch, and a short flared brim that keeps the sun off your face on crisp autumn days. Four narrow white vertical stripes run evenly down the butter yellow body, giving it a subtle paneled effect that looks polished without being fussy. It is an advanced beginner project that works up quickly, feels warm and substantial, and makes a great gift for the men in your life.
Materials Needed
- Yarn: Bulky weight (weight category 5) wool, approximately 150 yards (137 m) butter yellow (Color A) and 50 yards (46 m) white (Color B)
- Hook: 6.0 mm (J-10) crochet hook
- Notions: Stitch marker, tapestry needle, scissors, tape measure
- Finished size: Circumference 22 inches (56 cm), height 6 inches (15 cm) including brim
Abbreviations
- st(s): stitch(es)
- sc: single crochet
- dc: double crochet
- fpdc: front post double crochet (work the double crochet around the post of the stitch below, from the front, instead of into the top of the stitch)
- inc: increase (work 2 sc in the same stitch)
- MR: magic ring (adjustable ring)
- Rnd: round
Gauge
12 stitches and 8 rows in alpine stitch = 4 inches (10 cm). To check, work a small swatch in the alpine stitch pattern and measure across the middle of the swatch; adjust your hook size if needed to match.
Tips Before You Start
- Keep your tension even in the alpine stitch so the front post double crochets stay upright and the texture looks uniform around the hat.
- Use a stitch marker at the beginning of each round so you never lose your place, especially when changing colors.
- Change colors on the last stitch of the round before the new color begins, so the stripes stay crisp and even.
- Try the hat on as you go; the crown should sit flat and the body should fit comfortably before you begin the brim.
Step-by-Step Instructions
Crown (Color A)
Rnd 1: MR, 8 sc into the ring (8 sts).
Rnd 2: inc in each st around (16 sts).
Rnd 3: [sc, inc] x8 (24 sts).
Rnd 4: [2 sc, inc] x8 (32 sts).
Rnd 5: [3 sc, inc] x8 (40 sts).
Rnd 6: [4 sc, inc] x8 (48 sts).
Rnd 7: [5 sc, inc] x8 (56 sts).
Rnd 8: [6 sc, inc] x8 (64 sts).
Rnd 9: [7 sc, inc] x8 (72 sts).
Rnd 10: sc in each st around (72 sts). Do not fasten off.
Body (Alpine Stitch in Rounds)
Rnd 11 (A): dc in each st around (72 sts).
Rnd 12 (A): [fpdc around next st, sc in next st] repeat around (72 sts).
Rnd 13 (A): [sc in next st, fpdc around next st] repeat around (72 sts).
Rnds 14–15 (A): repeat Rnds 12–13 (72 sts). Change to B.
Rnds 16–17 (B): repeat Rnds 12–13 (72 sts). Change to A.
Rnds 18–25 (A): repeat Rnds 12–13 (72 sts). Change to B.
Rnds 26–27 (B): repeat Rnds 12–13 (72 sts). Change to A.
Rnds 28–35 (A): repeat Rnds 12–13 (72 sts). Change to B.
Rnds 36–37 (B): repeat Rnds 12–13 (72 sts). Change to A.
Rnds 38–45 (A): repeat Rnds 12–13 (72 sts). Change to B.
Rnds 46–47 (B): repeat Rnds 12–13 (72 sts). Change to A.
Rnds 48–55 (A): repeat Rnds 12–13 (72 sts). Fasten off.
Brim (Color A)
Join A to any stitch at the bottom edge.
Rnd 1: sc in each st around (72 sts).
Rnd 2: [sc in next 8 sts, inc] x8 (80 sts).
Rnd 3: sc in each st around (80 sts).
Rnd 4: [sc in next 9 sts, inc] x8 (88 sts).
Rnd 5: sc in each st around (88 sts).
Rnd 6: [sc in next 10 sts, inc] x8 (96 sts).
Rnd 7: sc in each st around (96 sts). Fasten off.
Assembly and Finishing
There is no seaming required for this hat, as it is worked in one piece from the crown to the brim. Weave in all ends securely on the inside of the hat, using the tapestry needle to hide them within the stitches. Block the hat lightly by misting it with water and shaping it over a bowl or hat form to the finished measurements, then let it dry completely. This helps the brim lie flat and the alpine stitch texture settle evenly.
Pro Tips and Variations
- Swap the white stripes for a contrasting color like charcoal or rust for a different seasonal look.
- Add a round of reverse single crochet around the brim edge for a neat, finished border.
- Work the brim in a slightly larger hook size for a floppier, more relaxed sun hat feel.