Granny Square Baby Bonnet: Free Crochet Pattern
Granny Square Baby Bonnet: Free Crochet Pattern
Introduction
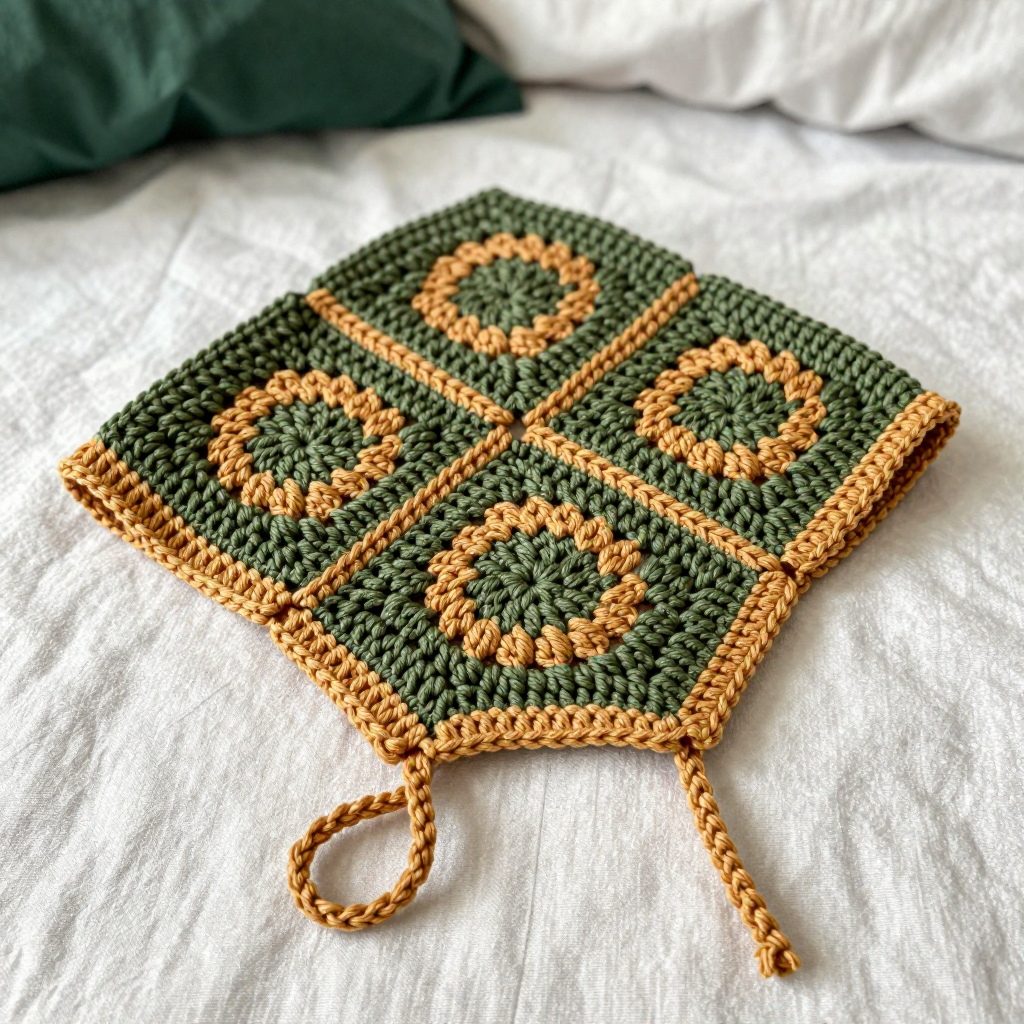
This little bonnet is a sweet, bohemian take on a classic granny square, made from just four squares joined together and folded into shape. It is written for confident beginners who can work double crochet and single crochet, and it comes together quickly enough for a last-minute baby gift. The olive body with ochre seams, shell edging, and cord ties gives it a warm, earthy look that feels soft and cozy against a baby's head. At 14 inches (36 cm) around and 6 inches (15 cm) tall, it fits most babies from 0 to 6 months.
Materials Needed
- Yarn: DK weight (3), cotton or acrylic. Color A (olive): 100 yds. Color B (ochre): 50 yds.
- Hook: 4.5 mm (US 7)
- Notions: Tapestry needle, scissors, stitch marker (optional), blocking mat and pins
- Finished size: Fits 0-6 months; circumference 14 inches (36 cm), height 6 inches (15 cm)
Abbreviations
- ch – chain
- sl st – slip stitch
- dc – double crochet
- sc – single crochet
- sp – space
- st(s) – stitch(es)
- rep – repeat
Gauge
One granny square measures 3.5 inches (9 cm) after blocking. Work one square and block it lightly; if it comes out larger or smaller, change hook size until it matches.
Tips Before You Start
- Make all four squares first and block them together so they are exactly the same size before joining.
- Keep your joining single crochet loose so the seams stay soft and stretchy on a baby's head.
- When folding, match right sides together before seaming the back edge so the bonnet turns out neatly.
- Count your stitches at the end of each round; each square should end with 48 sc.
Step-by-Step Instructions
Granny Square (make 4, with Color A)
Rnd 1: Ch 4, join with sl st to form a ring. Ch 3 (counts as dc), 2 dc in ring, [ch 2, 3 dc in ring] 3 times, ch 2, join with sl st to top of ch-3 (12 dc, 4 ch-2 sps).
Rnd 2: Ch 3, 2 dc in same sp, ch 2, 3 dc in same sp, *ch 1, (3 dc, ch 2, 3 dc) in next ch-2 sp; rep from * around, ch 1, join with sl st to top of ch-3 (24 dc, 4 ch-1 sps, 4 ch-2 sps).
Rnd 3: Ch 3, 2 dc in same sp, ch 2, 3 dc in same sp, *ch 1, 3 dc in next ch-1 sp, ch 1, (3 dc, ch 2, 3 dc) in next ch-2 sp; rep from * around, ch 1, join with sl st to top of ch-3 (36 dc, 8 ch-1 sps, 4 ch-2 sps).
Rnd 4: Ch 1, sc in each dc and ch-1 sp around, working 3 sc in each ch-2 sp. Join with sl st to first sc. Fasten off (48 sc). Square measures 3.5 inches (9 cm).
Joining (with Color B)
Arrange the four squares in a 2x2 grid. Join with B using sc through both layers: work sc in each st across, matching sts. Join all seams.
Fold and Back Seam (with Color B)
Fold the joined piece in half diagonally to form the bonnet shape, with right sides together. Join the two open edges (back seam) with sc in B. Turn right side out.
Edging (with Color B)
Rnd 1: Join yarn at bottom front edge. Sc evenly around the entire opening (front and bottom), working 3 sc in corners. Join with sl st.
Rnd 2: Ch 1, *sc in next st, skip 2 sts, 5 dc in next st (shell), skip 2 sts; rep from * around, adjusting to end with sc. Join with sl st. Fasten off.
Ties (make 2, with Color B)
Tie: Ch 60, sl st in each ch across. Fasten off. Make 2.
Assembly and Finishing
Attach one tie to each side of the bonnet at the bottom front corners, using the tapestry needle or a sl st. Weave in all ends neatly on the wrong side. Block lightly, pinning the bonnet to shape and letting it dry fully before use.
Pro Tips and Variations
- Swap the olive and ochre for a two-tone pastel palette, or use a single color for a simpler look.
- Add a small pom-pom or tassel to each tie end for extra charm.
- For a slightly larger bonnet, use a 5 mm (US H-8) hook and check the square gauge again.