Oatmeal Cable-Look Crochet Headband Free Pattern
Introduction
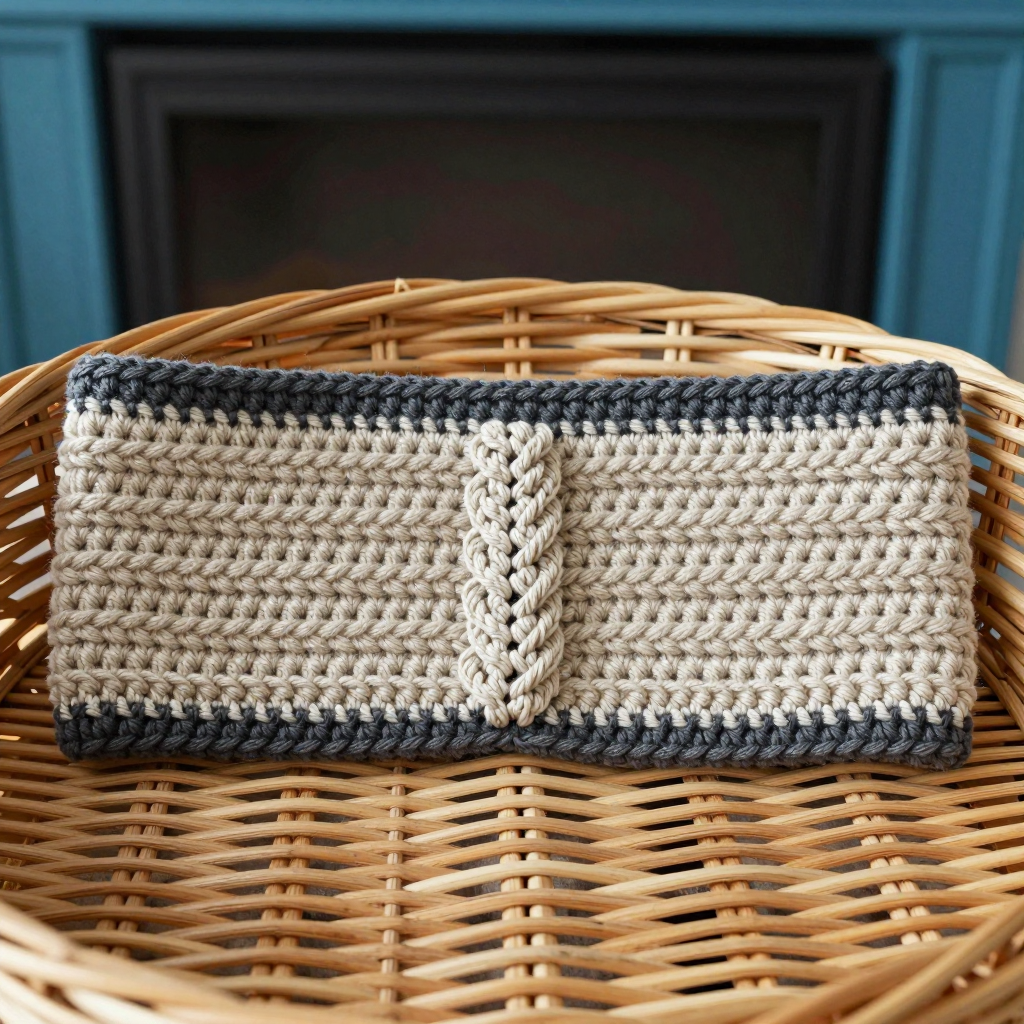
This oatmeal cable-look headband is the perfect quick project for anyone who wants a cozy, Scandinavian-style accessory without committing to a full sweater. It's a simple straight rectangle worked in single crochet, with a single raised "cable" ridge running up the center made entirely from front-post and back-post double crochet stitches — no cable needle required. The natural oatmeal body is framed by two dark grey stripes at one end and a matching grey edging along the top and bottom, giving it a clean, modern look. It works up in an evening in soft DK wool, feels warm and stretchy against the ears, and fits comfortably over a 20–23" adult head.
Materials Needed
- Yarn: DK (weight 3), wool or wool-blend. Oatmeal (A): approx 90 yds. Dark Grey (B): approx 20 yds.
- Hook: 5.0 mm (US H/8)
- Notions: Tapestry needle, scissors, stitch marker (optional), tape measure
- Finished size: Approx 20" circumference x 3.5" wide, stretches to fit a 20–23" adult head
Abbreviations
- ch — chain
- sc — single crochet
- dc — double crochet
- fpdc — front post double crochet: work a dc around the post of the stitch below, inserting the hook from front to back
- bpdc — back post double crochet: work a dc around the post of the stitch below, inserting the hook from back to front
- sl st — slip stitch
- rep — repeat
- sts — stitches
Gauge
7 sts and 6 rows = 2" in pattern (sc with fpdc cable). Work a small swatch and measure a 2" section; if you have more stitches than 7, go up a hook size, and if you have fewer, go down.
Tips Before You Start
- The cable ridge is worked around the post of the stitch two rows below, so keep your tension relaxed — pulling too tight will make the ridge pucker.
- Count your 12 stitches at the end of every row; the cable column sits in the same spot each time, so a missed stitch will throw off the ridge.
- Change colors on the last yarn-over of the final stitch of a row for a clean stripe edge.
- Leave a generous 12" tail at the end for seaming — it makes the whipstitch join much easier.
Step-by-Step Instructions
Band (Color A)
Set-up: With A, ch 13.
Row 1: sc in 2nd ch from hook, sc across (12 sts).
Row 2: ch 1, turn, sc 5, fpdc around post of next sc 2 rows below, sc 6 (12 sts).
Row 3: ch 1, turn, sc 5, bpdc around post of fpdc, sc 6 (12 sts).
Row 4: ch 1, turn, sc 5, fpdc around post of bpdc, sc 6 (12 sts).
Rows 5–38: rep Rows 3–4 alternately (12 sts).
Change to B.
Rows 39–41: ch 1, turn, sc across (12 sts).
Change to A.
Rows 42–44: ch 1, turn, sc across (12 sts).
Change to B.
Rows 45–47: ch 1, turn, sc across (12 sts). Fasten off, leave a 12" tail.
Assembly
Fold the band in half with the short ends together and whipstitch the seam through both layers.
Edging (Color B)
Top edge: With B, join to the seam, sc evenly around the top edge (approx 60 sc), sl st to join.
Bottom edge: Rep around the bottom edge (approx 60 sc), sl st to join.
Assembly and Finishing
Whipstitch the short ends together through both layers to form the closed band, keeping the seam flat. Weave in all ends on the wrong side, using the long tail to reinforce the seam. Block lightly by misting with water and patting flat to dry — this helps the cable ridge stand up and evens out the edges. Do not stretch the band while blocking.
Pro Tips and Variations
- Make it in a solid color for a minimalist look, or swap the grey stripes for a contrasting pop like mustard or rust.
- Add a second cable column by working two fpdc/bpdc ridges spaced evenly across the row.
- Work a few extra rows for a wider earwarmer, or fewer for a slim headband — just keep the stripe rows in threes.