Deco Picot Edge Tutu: Free Crochet Pattern
Introduction
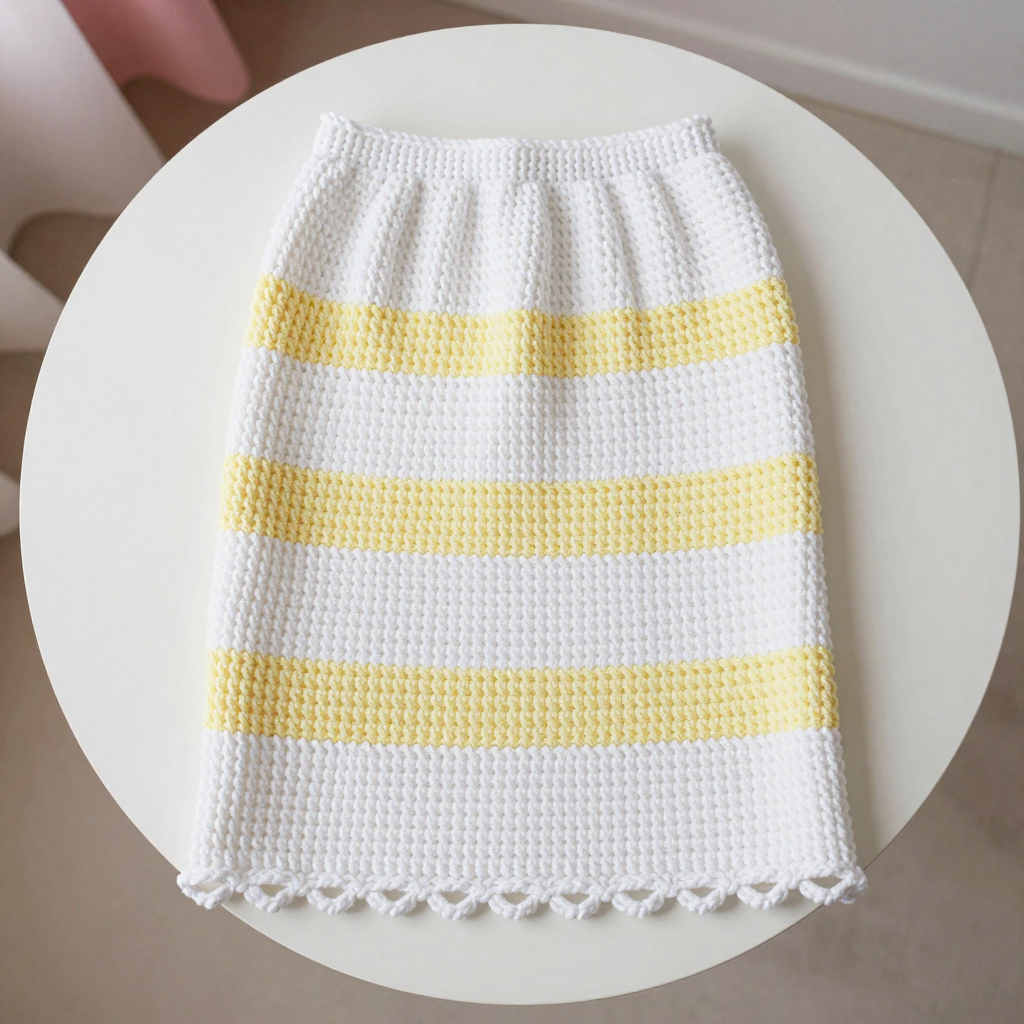
This little Deco Picot Edge Tutu is a sweet, simple skirt that's perfect for beginners who want to make something wearable and pretty. It's designed for sizes 2-4T and works up as a straight tube in soft worsted weight acrylic, so it's comfy and easy to care for. The look is clean and classic: a white ground with three evenly spaced butter yellow stripes and a row of tiny pointed picot loops along the hem for a subtle art deco touch. The fabric is smooth, dense single crochet that holds its shape, and the elastic waistband keeps it snug and easy to pull on. If you can single crochet in joined rounds, you can make this tutu.
Materials Needed
- Yarn: Worsted weight (4) acrylic yarn — approximately 150 yards white (Color A) and 50 yards butter yellow (Color B).
- Hook: 5.0 mm (H/8) crochet hook.
- Notions: Yarn needle, scissors, stitch marker (optional, for marking the first stitch of each round), and 3/4-inch (2 cm) wide elastic — cut to your child's waist measurement plus 1 inch.
- Finished size: Waist circumference 20 inches unstretched, length 10 inches; fits sizes 2-4T.
Abbreviations
- ch — chain: make a loop of yarn and pull it through the loop on your hook.
- sc — single crochet: insert hook into stitch, yarn over, pull up a loop, yarn over, pull through both loops.
- sl st — slip stitch: insert hook into stitch, yarn over, pull through both the stitch and the loop on your hook.
- rnd(s) — round(s): one complete circle of stitches worked around the tube.
- rep — repeat: work the instructions again as many times as stated.
- sts — stitches.
Gauge
16 stitches and 16 rounds = 4 inches in single crochet. To check, crochet a small swatch in sc and measure a 4-inch section; if you have more stitches than 16, go up a hook size, and if you have fewer, go down a size.
Tips Before You Start
- Don't twist the ring. When you join the starting chain into a ring, make sure the chain lies flat and untwisted before working Round 1, or the whole skirt will spiral.
- Mark your first stitch. Place a stitch marker in the first sc of each round so you always know where to join and where the round begins.
- Keep your tension even. Because the skirt is a straight tube with no shaping, consistent tension is what keeps the stripes straight and the fabric smooth.
- Change colors on the join. Work the final yarn over of the joining slip stitch with the new color so the color change sits neatly at the back of the skirt.
Step-by-Step Instructions
Waistband and Body (worked in joined rounds)
All rounds are joined with a sl st to the first stitch of the round. The body stays a constant 80 stitches with no increases or decreases.
Setup: With A, ch 80, join with sl st to first ch to form a ring, being careful not to twist.
Rnd 1: Ch 1, sc in each ch around, join with sl st to first sc (80 sts).
Rnd 2: Ch 1, sc in each sc around, join with sl st to first sc (80 sts). Change to B.
Rnds 3-4: Ch 1, sc in each sc around, join with sl st to first sc (80 sts). Change to A.
Rnds 5-10: Ch 1, sc in each sc around, join with sl st to first sc (80 sts). Change to B.
Rnds 11-12: Ch 1, sc in each sc around, join with sl st to first sc (80 sts). Change to A.
Rnds 13-18: Ch 1, sc in each sc around, join with sl st to first sc (80 sts). Change to B.
Rnds 19-20: Ch 1, sc in each sc around, join with sl st to first sc (80 sts). Change to A.
Rnds 21-26: Ch 1, sc in each sc around, join with sl st to first sc (80 sts). Do not fasten off.
Picot Edging
Rnd 27: Ch 1, sc in first sc, *ch 3, sl st in third ch from hook (picot), skip next sc, sc in next sc; rep from * around, join with sl st to first sc. Fasten off.
Assembly and Finishing
Weave in all ends with your yarn needle, working them into the inside of the fabric so they don't show. Cut the elastic to your child's waist measurement plus 1 inch, overlap the ends, and sew them securely with a few firm stitches. Insert the elastic through the top waistband, adjust it so the gathers are even all around, and sew the opening closed. Gently block the skirt by misting it lightly and smoothing it flat to dry; this helps the picot points sit neatly and evens out the stripes.
Pro Tips and Variations
- Change the stripe colors: Swap butter yellow for blush pink, mint, or any accent color to match a favorite outfit.
- Make it longer or shorter: Add or remove white rounds in the Rnds 21-26 section to adjust the length, keeping the picot edging as the final round.
- Add a second picot row: Work a picot round at the top edge before inserting the elastic for a matching deco trim at the waist.


