Little Louvre Crochet Baby Vest Free Pattern
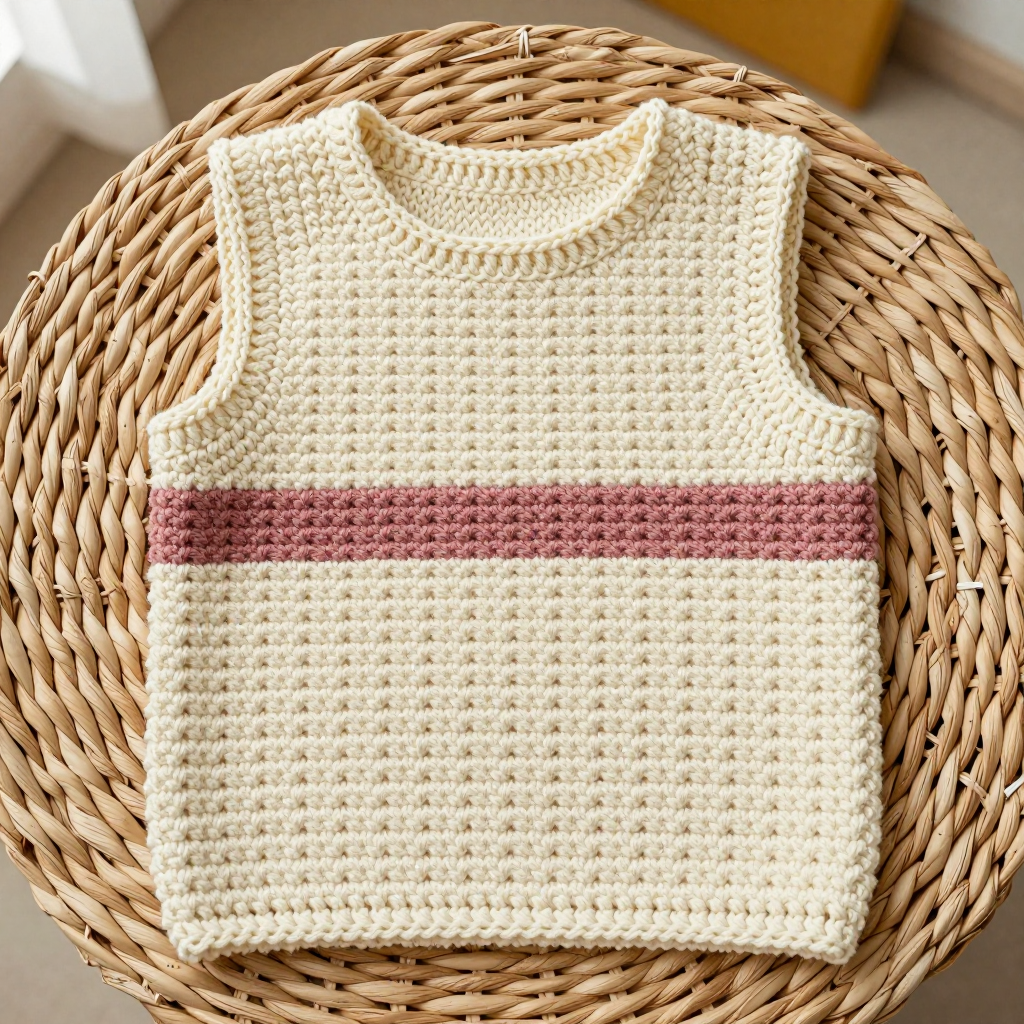
Little Louvre Crochet Baby Vest Free Pattern
Introduction
The Little Louvre Baby Vest is a sweet, Parisian-inspired layering piece made for the tiniest wardrobe. It is worked as one simple straight tube from the bottom up, so there is no fiddly shaping to worry about — just steady double crochet and a single dusty-rose stripe across the chest. The result is a clean, elegant little tank that looks lovely over a bodysuit or under a cardigan. Dense, even, and slightly ridged, the cotton fabric feels soft and breathable against delicate skin, and the plain single-crochet trim keeps the edges neat and comfortable. It is a perfect baby shower gift or a quick first garment for a crocheter ready to move beyond blankets.
Materials Needed
- Yarn: Fine (2) weight yarn, 100% cotton or cotton blend — 200 yds cream (A) and 50 yds dusty rose (B)
- Hook: 4 mm (G/6) crochet hook
- Notions: Stitch marker, tapestry needle, scissors, tape measure
- Finished size: 0–3 months — chest circumference 16 inches, length 9 inches
Abbreviations
- ch — chain: make a loop of yarn and pull it through the loop on your hook.
- dc — double crochet: yarn over, insert hook in stitch, pull up a loop, yarn over and pull through two loops, yarn over and pull through the last two loops.
- sc — single crochet: insert hook in stitch, pull up a loop, yarn over and pull through both loops.
- sl st — slip stitch: insert hook in stitch, yarn over and pull through both the stitch and the loop on your hook.
- st(s) — stitch(es)
- sp(s) — space(s)
- sk — skip: leave the next stitch unworked.
Gauge
24 stitches and 20 rows = 4 inches in double crochet. To check, crochet a small swatch in dc and measure a 4-inch section in the middle — if you have more stitches than 24, go up a hook size; if fewer, go down.
Tips Before You Start
- When you join the starting chain into a ring, check carefully that it is not twisted before working Row 1 — a twist here cannot be fixed later.
- Use a stitch marker at the beginning of each round so you never lose your place in the long 96-stitch rounds.
- Keep your tension even and relaxed; a dense dc fabric is what gives this vest its shape, but tight stitches will make the armholes stiff.
- Carry or fasten off the cream yarn neatly when you switch to dusty rose, and keep the color changes on the same side of the tube so the stripe sits cleanly across the chest.
Step-by-Step Instructions
The vest is worked in one piece from the bottom up.
Body (Tube)
Setup: With A, ch 96, join with sl st to first ch to form a ring, being careful not to twist.
R1: ch 2 (counts as first dc), dc in each ch around, join with sl st to top of ch-2 (96 dc).
R2–10: ch 2, dc in each st around, join (96 dc).
Change to B.
R11–12: ch 2, dc in each st around, join (96 dc).
Change to A.
R13–18: ch 2, dc in each st around, join (96 dc).
Shape Armholes
R19: ch 2, dc in next 20 sts, ch 8, sk 8 sts (armhole), dc in next 40 sts, ch 8, sk 8 sts (armhole), dc in last 20 sts, join (80 dc, 2 ch-8 sps).
R20: ch 2, dc in each dc and in each ch of the ch-8 sps around, join (96 dc).
R21–24: ch 2, dc in each st around, join (96 dc).
Fasten off.
Edging
Armhole 1: With A, join yarn at one armhole, sc evenly around the armhole opening, join with sl st. Fasten off.
Armhole 2: Repeat the same sc edging around the second armhole, join with sl st. Fasten off.
Neckline: Join yarn at the neckline (top edge), sc evenly around, join with sl st. Fasten off.
Assembly and Finishing
This vest needs no seaming — it is worked in one piece, and the armholes and neckline are finished with the single-crochet edging above. Weave in all ends on the wrong side with your tapestry needle, working them in a few directions so they stay secure through washing. Block gently: mist the vest lightly, pat it into shape to the 16-inch chest and 9-inch length, and lay it flat to dry. Do not hang it, as the weight of wet cotton can stretch the tube.
Pro Tips and Variations
- Change the stripe: swap dusty rose for sage, butter yellow, or navy for a different look, or add a second two-row stripe for a bolder design.
- Size up: add multiples of 8 stitches to the starting chain and extra straight rounds to make larger sizes, keeping the 8-stitch armhole skips the same.
- Softer trim: work the armhole and neckline edging in a slightly smaller hook (3.5 mm) for a tidier, firmer finish that holds its shape.


