Lilac Moss Stitch Crochet Bath Mat Free Pattern
Introduction
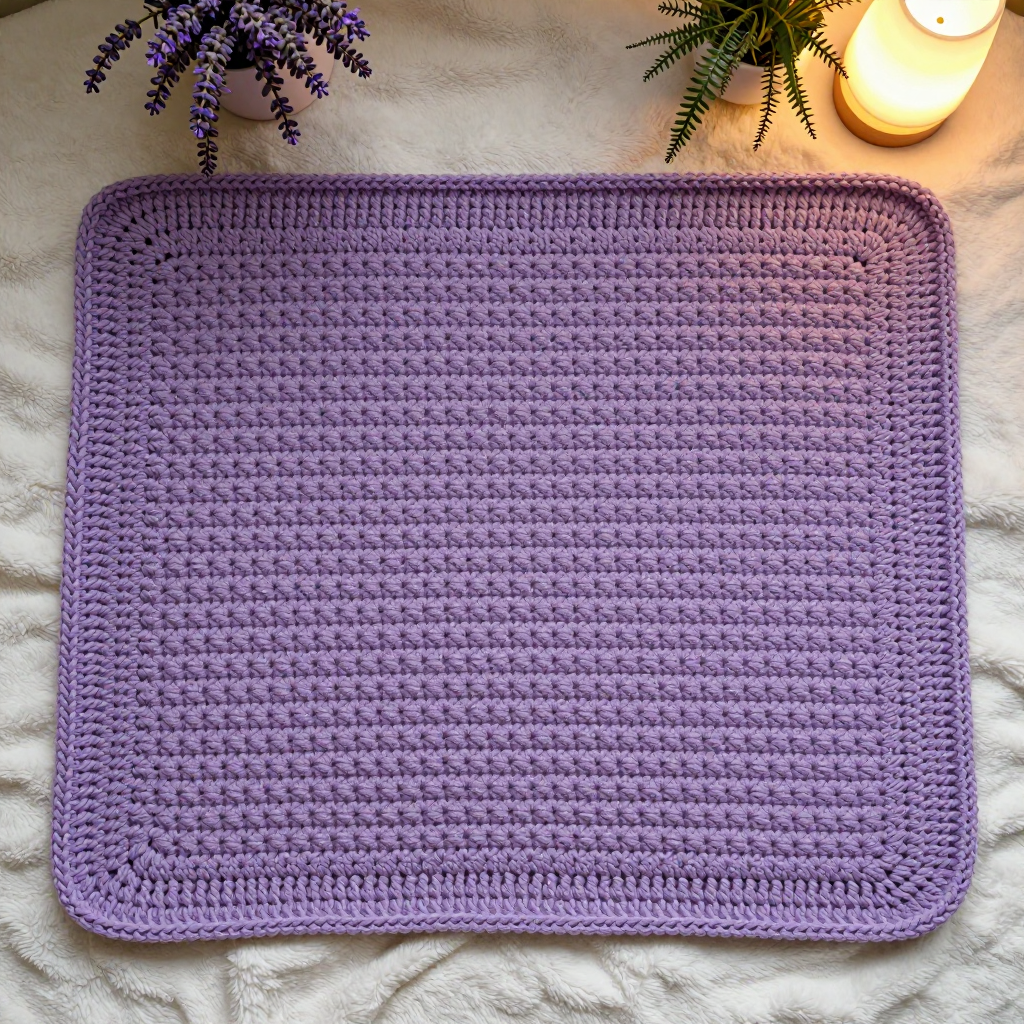
This lilac moss stitch bath mat is a cozy, practical project for anyone who wants a soft landing underfoot without a complicated pattern. It is beginner-friendly: the whole body uses just one stitch pattern, and the only shaping is a simple border worked evenly around the edge. The solid lilac color and clean rectangle give it a calm, mid-century modern look that suits almost any bathroom. Because it is worked in chunky cotton, the fabric comes out dense, textured, and reversible, with a grid-like moss stitch surface that feels plush and holds up well to daily use. A glued-on non-slip backing keeps it safely in place.
Materials Needed
- Yarn: Super bulky (6) weight cotton yarn, approx. 600 yds (550 m) in lilac (one solid color; no color changes).
- Hook: 10 mm (N/15) crochet hook.
- Notions: Tapestry needle for weaving in ends, scissors, tape measure, stitch markers (optional, for corners).
- Backing: Non-slip rug backing cut to 24 x 36 inches (61 x 91 cm), plus fabric glue.
- Finished size: 24 inches (61 cm) wide x 36 inches (91 cm) long.
Abbreviations
- ch – chain: make a loop of yarn and pull it through the loop on your hook.
- sc – single crochet: insert hook in stitch, yarn over, pull up a loop, yarn over, pull through both loops.
- sk – skip: leave the next stitch or chain unworked.
- sp – space: the small gap made by a chain-1 in the row below.
- rep – repeat: work the instructions again as many times as stated.
- sl st – slip stitch: insert hook, yarn over, pull through stitch and loop on hook at once.
- RS – right side: the front face of the mat.
- st(s) – stitch(es).
Gauge
8 sts and 8 rows = 4 inches (10 cm) in moss stitch. To check, crochet a small swatch in the moss stitch pattern and measure a 4-inch section; adjust your hook size if needed to match.
Tips Before You Start
- Keep your chain-1 spaces loose and even; tight chains make the moss stitch fabric stiff and hard to work into on the next row.
- Count your stitches at the end of each row: you should always have 24 sc and 24 ch-1 spaces across the row.
- Measure as you go rather than counting rows, since chunky cotton can stretch slightly; stop the body when it measures 36 inches (91 cm).
- Work the border with a relaxed hand so the edge lies flat and does not pull in the corners.
Step-by-Step Instructions
Main Body
Foundation: Ch 49.
Row 1: Sc in 2nd ch from hook, *ch 1, sk next ch, sc in next ch; rep from * across, turn (24 sc, 24 ch-1 sps).
Row 2: Ch 1, sc in first ch-1 sp, *ch 1, sk next sc, sc in next ch-1 sp; rep from * across, turn (24 sc, 24 ch-1 sps).
Rows 3–72: Rep Row 2 (24 sc, 24 ch-1 sps).
Continue repeating Row 2 until the piece measures 36 inches (91 cm), ending with a RS row. Do not fasten off.
Border
Rnd 1: Ch 1, sc evenly around entire perimeter, working 3 sc in each corner; join with sl st to first sc.
Rnd 2: Ch 1, sc in each sc around, working 3 sc in each corner; join with sl st to first sc. Fasten off.
Assembly and Finishing
Weave in all ends with the tapestry needle. Block the mat lightly by misting it with water and laying it flat to dry, shaping it to 24 x 36 inches (61 x 91 cm) so the border lies flat. Once dry, cut the non-slip rug backing to 24 x 36 inches (61 x 91 cm). Apply fabric glue to the back of the mat and press the backing on, smoothing out any wrinkles. Let it dry completely before using the mat.
Pro Tips and Variations
- For a softer, quicker-drying mat, try a super bulky cotton-blend yarn; keep the same gauge.
- Add a third border round in a contrasting color for a subtle pop of color.
- Make a smaller version as a bath-side runner by chaining fewer stitches, keeping the same moss stitch repeat.