Coastal Breeze Doll Capelet Free Crochet Pattern
Introduction
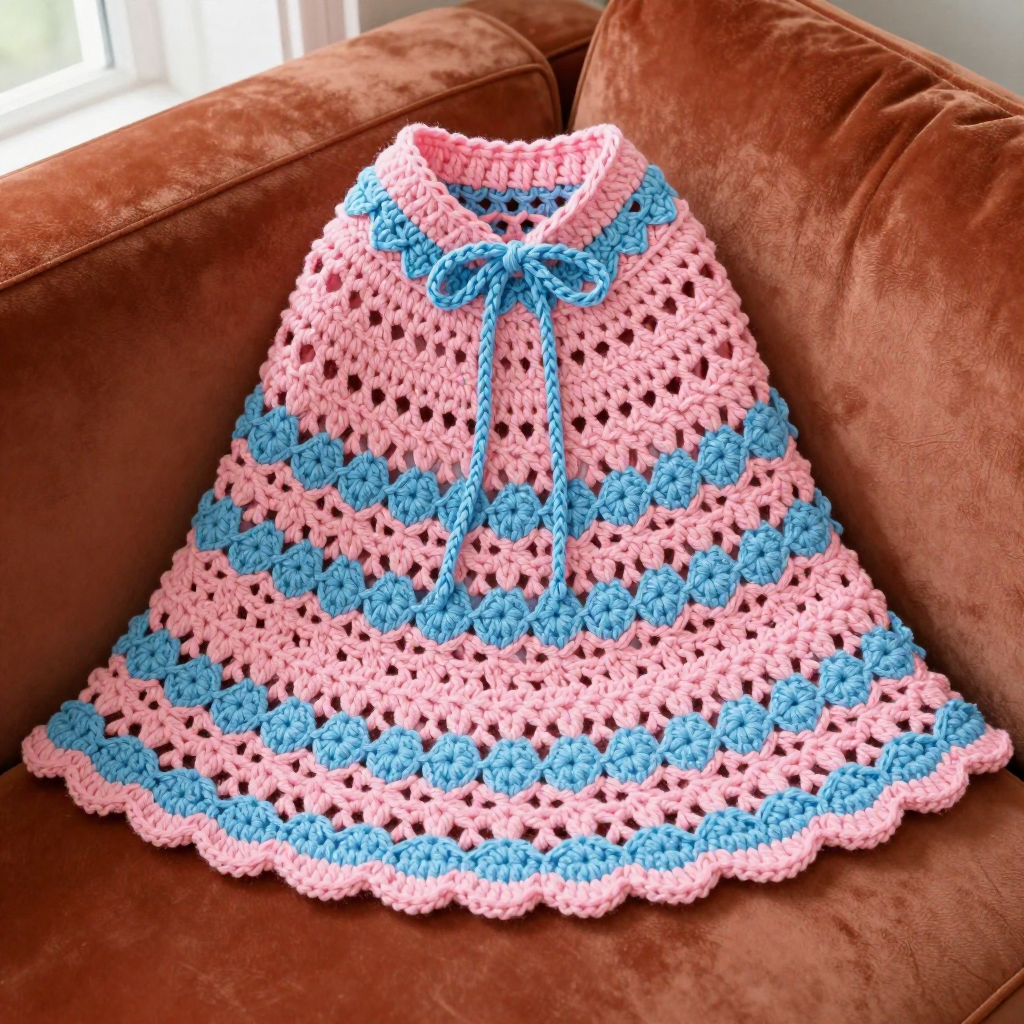
The Coastal Breeze Doll Capelet is a sweet little layer for any 18-inch doll's summer wardrobe, and it's a lovely project for anyone who wants to try lace crochet on a small, forgiving scale. Worked from the neck down in one piece, it uses a simple mesh of three-double-crochet groups that opens up row by row, so the capelet flares gently from a snug neck ring to a soft, scalloped hem. The gradient stripes — cotton candy pink at the top, a baby blue band in the middle, pink again, then baby blue at the hem — give it a breezy, seaside feel. In sport weight cotton it's light, crisp, and just stiff enough to hold its shape, making it a quick, satisfying make you can finish in an evening.
Materials Needed
- Yarn: Sport weight (2) 100% cotton, 50 g / 125 yds per skein. Color A (cotton candy pink): 30 yds. Color B (baby blue): 30 yds.
- Hook: 3.5 mm (E/4), or the size needed to match gauge.
- Notions: Tapestry needle for weaving in ends, scissors, a stitch marker (optional, for the start of each round).
- Finished size: Neck circumference 4.5" (11.5 cm), hem circumference 12" (30.5 cm), length 5" (12.5 cm) from neck to hem.
Abbreviations
- ch — chain: yarn over and pull through the loop on your hook.
- sl st — slip stitch: insert hook, yarn over, pull through both the stitch and the loop on your hook.
- sc — single crochet: insert hook, yarn over, pull up a loop, yarn over, pull through both loops.
- dc — double crochet: yarn over, insert hook, pull up a loop, yarn over and pull through two loops, yarn over and pull through the last two loops.
- sk — skip: work past the next stitch without working into it.
- sp — space: the gap made by a chain (for example, a "ch-1 sp").
- beg — beginning.
- rep — repeat.
- st(s) — stitch(es).
Gauge
4 mesh pattern repeats = 4" (10 cm) in pattern, and 8 rows = 4" (10 cm). Work a small swatch in the mesh pattern and measure a few repeats across the middle of the fabric; if your repeats are wider than 1" each, go down a hook size, and if narrower, go up.
Tips Before You Start
- When you join the starting chain into a ring, check carefully that it isn't twisted — a twist here can't be fixed later and will throw off the whole neckline.
- Each round begins with a ch-3 that counts as your first dc. Work your first real dc into the next stitch, not the base of the ch-3, so your stitch counts stay correct.
- Keep your chain spaces loose and even; the flare of the capelet depends on those spaces opening up row by row, and tight chains will pull the hem in.
- Change colors at the end of the round by finishing the joining sl st with the new color, then carry the old color loosely up the inside — the mesh hides the floats nicely.
Step-by-Step Instructions
Capelet (worked top-down in one piece)
With Color A, ch 36, join with sl st to form a ring, being careful not to twist.
R1: Ch 1, sc in each ch around, join with sl st to first sc (36 sc).
R2: Ch 3 (counts as dc), dc in next 2 sc, *ch 1, sk next sc, dc in next 3 sc; rep from * around, join with sl st to top of beg ch-3 (9 groups of 3 dc, 9 ch-1 sps).
R3: Ch 3, dc in next 2 dc, *ch 1, dc in next 3 dc; rep from * around, join (9 groups of 3 dc, 9 ch-1 sps).
R4: Ch 3, dc in next 2 dc, *ch 2, dc in next 3 dc; rep from * around, join (9 groups of 3 dc, 9 ch-2 sps).
R5: Ch 3, dc in next 2 dc, *ch 2, dc in next 3 dc; rep from * around, join (9 groups of 3 dc, 9 ch-2 sps).
R6: Ch 3, dc in next 2 dc, *ch 3, dc in next 3 dc; rep from * around, join (9 groups of 3 dc, 9 ch-3 sps).
R7: Ch 3, dc in next 2 dc, *ch 3, dc in next 3 dc; rep from * around, join (9 groups of 3 dc, 9 ch-3 sps).
Change to Color B.
R8: Ch 3, dc in next 2 dc, *ch 3, dc in next 3 dc; rep from * around, join (9 groups of 3 dc, 9 ch-3 sps).
R9: Ch 3, dc in next 2 dc, *ch 4, dc in next 3 dc; rep from * around, join (9 groups of 3 dc, 9 ch-4 sps).
R10: Ch 3, dc in next 2 dc, *ch 4, dc in next 3 dc; rep from * around, join (9 groups of 3 dc, 9 ch-4 sps).
Change to Color A.
R11: Ch 3, dc in next 2 dc, *ch 4, dc in next 3 dc; rep from * around, join (9 groups of 3 dc, 9 ch-4 sps).
R12: Ch 3, dc in next 2 dc, *ch 5, dc in next 3 dc; rep from * around, join (9 groups of 3 dc, 9 ch-5 sps).
R13: Ch 3, dc in next 2 dc, *ch 5, dc in next 3 dc; rep from * around, join (9 groups of 3 dc, 9 ch-5 sps).
Change to Color B.
R14: Ch 3, dc in next 2 dc, *ch 5, dc in next 3 dc; rep from * around, join (9 groups of 3 dc, 9 ch-5 sps).
R15: Ch 1, sc in each dc and in each ch-1 sp around, join with sl st to first sc (36 sc).
Edging (scallops)
R16: Ch 1, sc in first sc, *sk next 2 sc, 5 dc in next sc, sk next 2 sc, sc in next sc; rep from * around, join with sl st to first sc (6 scallops).
Fasten off. Weave in ends.
Neck Tie
With Color B, ch 50, sl st in each ch across. Fasten off. Weave through the R1 spaces and tie in a bow.
Assembly and Finishing
There's no seaming to do — the capelet is worked in one piece from the neck down, and the neck tie is a separate cord. Weave in all ends on the wrong side, running each tail through a few stitches in its own color so it doesn't show through the mesh. Block the capelet lightly: mist it with water, smooth the scallops flat with your fingers, and lay it flat to dry, pinning the hem to a 12" (30.5 cm) circle if you'd like a crisp edge. Thread the neck tie through the spaces of R1, slide the capelet onto your doll, and tie the bow at the front.
Pro Tips and Variations
- Change the palette: Swap the pink and blue for any two sport weight cotton colors — mint and cream, or lavender and white — to suit a different doll outfit.
- Add a bead: Thread a small bead onto each end of the neck tie before knotting, so the bow stays put.
- Make it longer: Repeat R13 once more before R14 and add 6 sc to the R15 round (42 sc) to keep the hem even, then work 7 scallops in R16.