Charcoal Ribbed Bath Mat Free Knit Pattern
Charcoal Ribbed Bath Mat Free Knit Pattern
Introduction
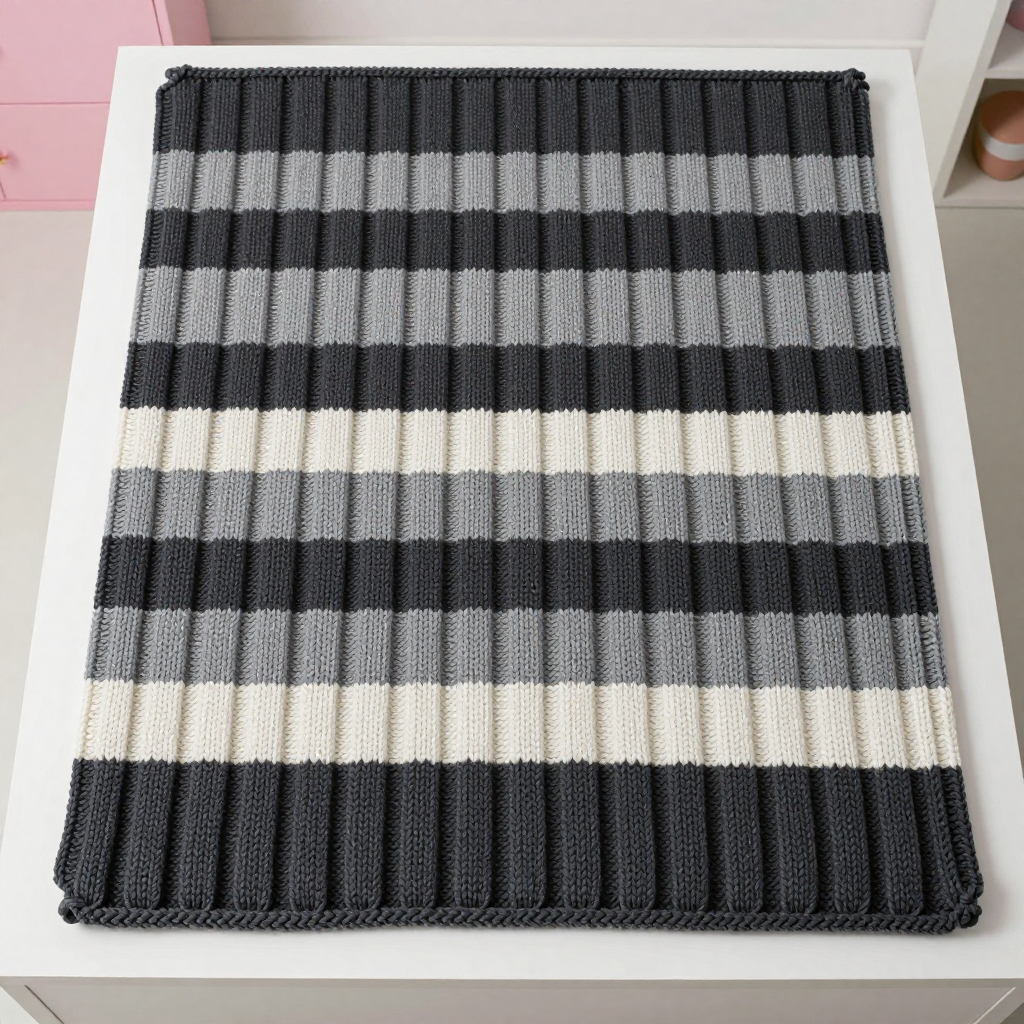
This thick, flat-knit bath mat is the perfect next step for an advanced beginner who wants a project that looks far more impressive than it is. Worked in simple 2x2 ribbing with faded black and grey stripes, it has a worn industrial grunge look that suits modern, minimalist, and loft-style bathrooms alike. The dense ribbed texture is wonderfully absorbent and cushioned underfoot, so it feels as good as it looks. Best of all, it is knit as one continuous rectangle with no seams, no shaping, and no border, making it a wonderfully relaxing knit from the first cast-on to the final bind-off.
Materials Needed
- Yarn: Super bulky (weight 6) cotton blend, approx. 300 yd total:
- Color A (charcoal): 2 skeins, approx. 150 yd
- Color B (faded grey): 1 skein, approx. 90 yd
- Color C (light ash grey): 1 skein, approx. 60 yd
- Needles: 9.0 mm (US 13) straight needles
- Notions: Tapestry needle for weaving in ends, tape measure, blocking pins and mats
- Optional: 22 x 30 in (56 x 76 cm) non-slip rug pad
- Finished size: 24 in (61 cm) wide x 32 in (81 cm) long
Abbreviations
- CO – cast on: create the starting stitches on your needle.
- k – knit stitch: insert the needle through the front of the stitch and pull a loop through.
- p – purl stitch: insert the needle through the front of the stitch with the yarn in front and pull a loop through.
- st(s) – stitch(es).
- R – row.
- BO – bind off: finish the edge so the stitches don't unravel.
- Rep – repeat.
Gauge
10 sts and 12 rows = 4 in (10 cm) in 2x2 rib, unstretched. To check it, knit a small swatch in 2x2 rib, lay it flat without stretching, and measure a 4 in (10 cm) section; adjust your needle size if needed to match.
Tips Before You Start
- Keep the rib unstretched. Measure and block your mat flat without pulling the edges, or the finished size will grow longer than 32 in (81 cm).
- Carry colors up the side. When you change stripes, leave the old color hanging at the edge and pick it up again on the next stripe rather than cutting it, so you have fewer ends to weave in.
- Count your rows. Use a row counter or a slip of paper to tick off each stripe, since the color changes are easy to lose track of in plain ribbing.
- Keep your tension relaxed. Super bulky cotton can feel stiff; looser stitches make the ribbing softer and more absorbent underfoot.
Step-by-Step Instructions
Panel (worked flat, one piece)
Row 1 (RS): With A, CO 60 sts. [k2, p2] to end (60 sts).
Row 2 (WS): [p2, k2] to end (60 sts).
Repeat Rows 1–2 for 2x2 rib throughout, following the stripe sequence below.
Stripe sequence:
Rows 1–12: Color A (12 rows).
Rows 13–20: Color B (8 rows).
Rows 21–28: Color A (8 rows).
Rows 29–36: Color C (8 rows).
Rows 37–48: Color B (12 rows).
Rows 49–56: Color A (8 rows).
Rows 57–64: Color C (8 rows).
Rows 65–72: Color B (8 rows).
Rows 73–84: Color A (12 rows).
Total: 84 rows (60 sts throughout).
Final row: BO all sts in rib (knit the knit sts and purl the purl sts as you bind off).
Assembly and Finishing
There is no seaming — the mat is one continuous panel. Weave in all ends on the wrong side with your tapestry needle, working each end through a few stitches in its own color so it blends in. Block lightly to 24 x 32 in (61 x 81 cm), pinning the edges straight and flat; do not stretch the rib. Let it dry completely before use. If you like, place the optional 22 x 30 in (56 x 76 cm) rug pad underneath the mat (not attached) to keep it from slipping.
Pro Tips and Variations
- Change the palette: Swap the greys for deep navy, oatmeal, and black for a different moody look, keeping the same stripe sequence.
- Make it wider or narrower: Add or remove stitches in multiples of 4 to change the width while keeping the 2x2 rib intact.
- Add a non-slip backing: Sew a few dots of fabric glue or attach a thin anti-slip grip strip along the wrong side for extra safety on tile floors.