Emerald Diamond Filet Wall Hanging Free Crochet Pattern
Introduction
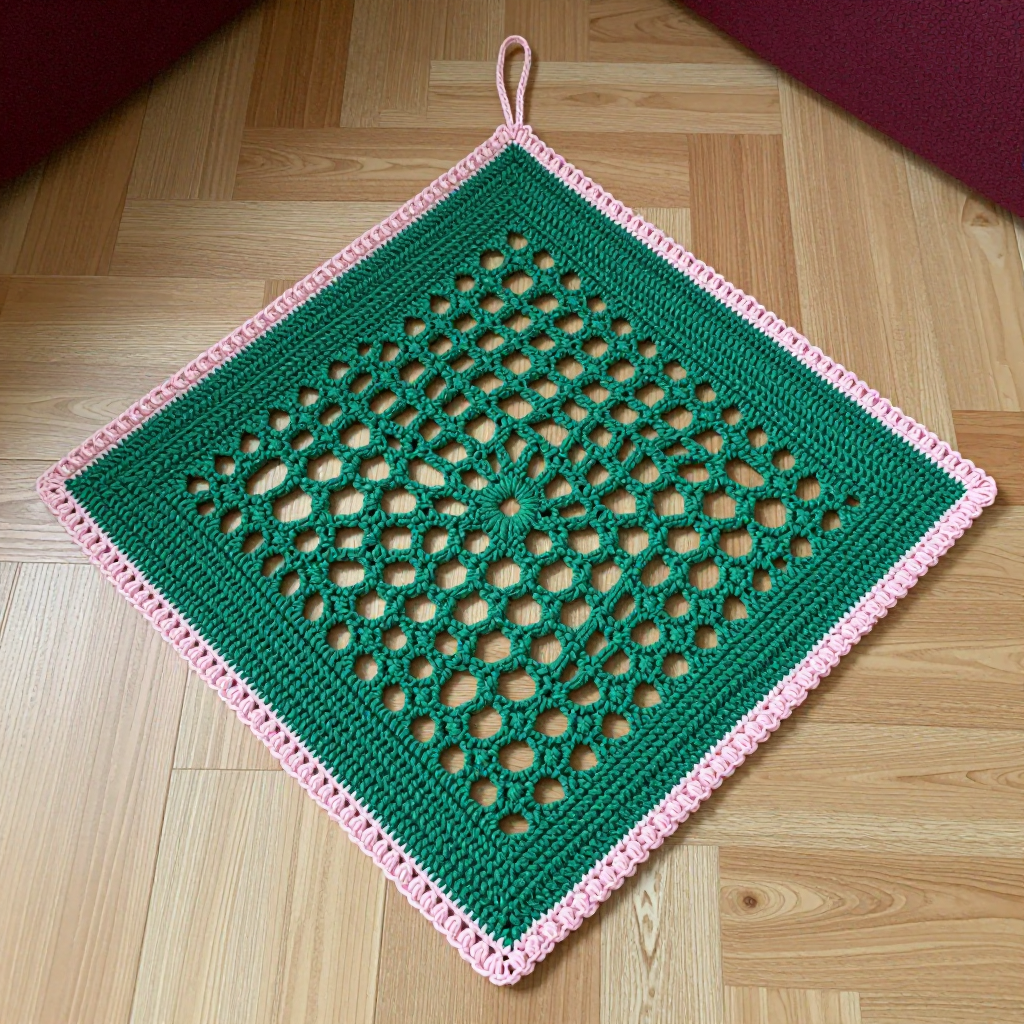
This Emerald Diamond Filet Wall Hanging is a crisp, preppy little accent that works up in an afternoon and looks far more intricate than it is. It's designed for beginners who have mastered double crochet and want to try filet-style openwork without a complicated chart — the diamond grows one space at a time, so you always know exactly what comes next. Worked in worsted cotton, the panel feels smooth and sturdy, with solid emerald blocks framing an airy lattice center and a soft blush picot border that gives it a fresh, tailored finish. Hung from one corner by a blush loop, it's the perfect pop of color for a small wall space, a craft corner, or a gallery wall.
Materials Needed
- Yarn: Worsted weight (CYC 4), 100% cotton. Color A (emerald): approximately 90 yd (82 m). Color B (blush): approximately 15 yd (14 m).
- Hook: 4.0 mm (US G-6), or size needed to match gauge.
- Notions: Tapestry needle for weaving in ends, scissors, rust-proof pins and a blocking mat or towel, and a small dowel or nail for hanging.
- Finished size: Approximately 9 in (23 cm) wide x 9 in (23 cm) tall, plus a 2 in (5 cm) hanging loop.
Abbreviations
- ch — chain: yarn over and pull through the loop on your hook.
- dc — double crochet: yarn over, insert hook in stitch, pull up a loop, yarn over and pull through 2 loops, yarn over and pull through the last 2 loops.
- sc — single crochet: insert hook in stitch, pull up a loop, yarn over and pull through both loops.
- sk — skip: leave the next stitch unworked.
- sl st — slip stitch: insert hook in stitch, yarn over and pull through both the stitch and the loop on your hook.
- st(s) — stitch(es).
- [ ] x — repeat the instructions inside the brackets the number of times shown.
Gauge
16 dc x 8 rows = 4 in (10 cm) in solid filet block. Work a small swatch of dc rows and measure the center of the fabric; if you have more stitches per 4 in, go up a hook size, and if you have fewer, go down.
Tips Before You Start
- The ch-1 spaces are the "holes" of the diamond. Keep each ch-1 snug so the lattice stays crisp and the panel doesn't sag.
- Count your stitches at the end of every row — each row of the panel has 35 stitches (dc and ch-1 spaces combined).
- Work the border in a relaxed tension; the blush edge should lie flat around the points, not pull the diamond out of shape.
- Cotton has little stretch, so block the finished panel while damp to open the lattice and sharpen the corners.
Step-by-Step Instructions
Panel (Color A)
Row 1: Ch 37, dc in 4th ch from hook, dc in each ch across (35 sts).
Rows 2-3: Ch 3 (counts as first dc), dc in each st across (35 sts).
Row 4: Ch 3, dc 17, ch 1, sk 1, dc 17 (35 sts).
Row 5: Ch 3, dc 16, ch 1, sk 1, dc 1, ch 1, sk 1, dc 16 (35 sts).
Row 6: Ch 3, dc 15, [ch 1, sk 1, dc 1] x2, ch 1, sk 1, dc 15 (35 sts).
Row 7: Ch 3, dc 14, [ch 1, sk 1, dc 1] x3, ch 1, sk 1, dc 14 (35 sts).
Row 8: Ch 3, dc 13, [ch 1, sk 1, dc 1] x4, ch 1, sk 1, dc 13 (35 sts).
Row 9: Ch 3, dc 12, [ch 1, sk 1, dc 1] x5, ch 1, sk 1, dc 12 (35 sts).
Row 10: Ch 3, dc 11, [ch 1, sk 1, dc 1] x6, ch 1, sk 1, dc 11 (35 sts).
Row 11: Ch 3, dc 10, [ch 1, sk 1, dc 1] x7, ch 1, sk 1, dc 10 (35 sts).
Row 12: Ch 3, dc 9, [ch 1, sk 1, dc 1] x8, ch 1, sk 1, dc 9 (35 sts).
Row 13: Ch 3, dc 8, [ch 1, sk 1, dc 1] x9, ch 1, sk 1, dc 8 (35 sts).
Row 14: Ch 3, dc 7, [ch 1, sk 1, dc 1] x10, ch 1, sk 1, dc 7 (35 sts).
Row 15: Ch 3, dc 6, [ch 1, sk 1, dc 1] x11, ch 1, sk 1, dc 6 (35 sts).
Row 16: Ch 3, dc 5, [ch 1, sk 1, dc 1] x12, ch 1, sk 1, dc 5 (35 sts).
Row 17: Ch 3, dc 4, [ch 1, sk 1, dc 1] x13, ch 1, sk 1, dc 4 (35 sts).
Row 18: Ch 3, dc 3, [ch 1, sk 1, dc 1] x14, ch 1, sk 1, dc 3 (35 sts).
Row 19: Ch 3, dc 2, [ch 1, sk 1, dc 1] x15, ch 1, sk 1, dc 2 (35 sts).
Row 20: Ch 3, dc 1, [ch 1, sk 1, dc 1] x16, ch 1, sk 1, dc 1 (35 sts).
Row 21: Ch 3, dc 17, ch 1, sk 1, dc 17 (35 sts).
Rows 22-23: Ch 3, dc in each st across (35 sts). Fasten off A.
Border (Color B)
Border round: Join B at the bottom point, ch 1, sc evenly around the entire diamond edge, working 3 sc in each corner point (approx 140 sc). Sl st to first sc.
Picot round: Ch 1, sc in each sc around, working a picot (ch 3, sl st in 3rd ch from hook) every 4th sc, with 3-sc corner points and a picot in the center sc of each corner. Sl st to first sc. Fasten off B.
Hanging Loop (Color B)
Loop: Join B at the top point, ch 20, sl st to the same point to form a loop, then sl st around the loop for firmness. Fasten off B.
Assembly and Finishing
There are no seams to sew — this is a single flat panel. Weave in all ends on the wrong side, running each tail through several stitches in two directions so it stays secure. Mist the panel lightly and pin it out to a true diamond on a blocking mat or towel, pinning each corner point and easing the picots flat. Let it dry completely, then remove the pins. Thread a small dowel or nail through the hanging loop at the top point and display.
Pro Tips and Variations
- Swap the blush for cream or gold for a more neutral look, or use a deeper green for a moodier palette.
- Work the same diamond in a lighter cotton and a 3.5 mm hook for a smaller ornament-sized version.
- Add a second picot round in color A around the border for a bolder, double-framed edge.