Rose Trellis Hooded Cover Up Free Pattern
Introduction
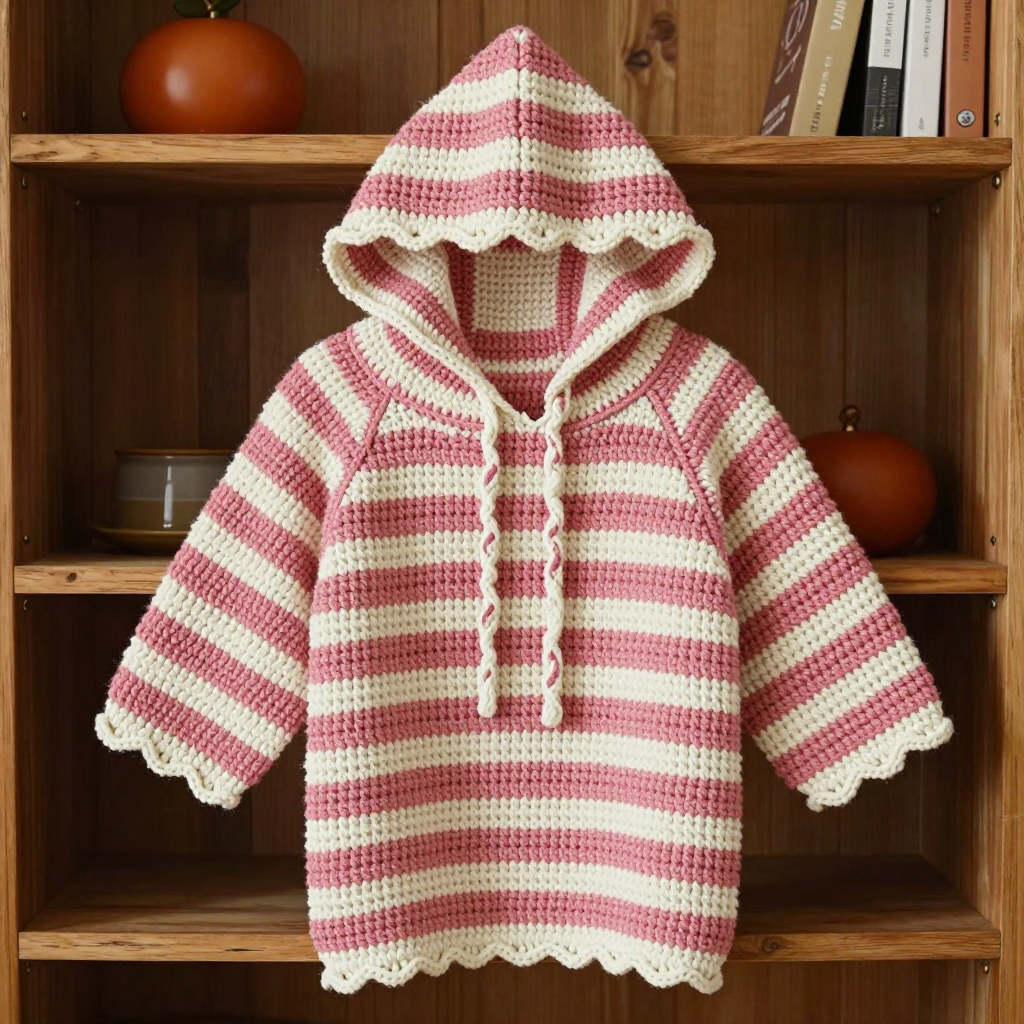
The Rose Trellis Hooded Cover Up is a soft, romantic layer for anyone who loves a cottagecore look with easy, wearable construction. It is written for advanced beginners and intermediate crocheters who are comfortable with half double crochet, single crochet, and simple shaping. The body is a straight tube worked flat and seamed, so there is no waist shaping or sleeve math to worry about. Rose-pink and ivory stripes ripple across the fabric, and a pointed folded-triangle hood with a scalloped ivory edge gives it a sweet, storybook finish. In a cotton or cotton-blend DK yarn it feels light and breathable, draping gently over the shoulders and falling to mid-thigh.
Materials Needed
- Yarn: DK (weight 3) light yarn, cotton or cotton-acrylic blend.
- Color A (rose pink): approx 500 (560, 620, 690, 760, 840, 920) yd
- Color B (ivory): approx 250 (280, 310, 345, 380, 420, 460) yd
- Hook: 8 mm (US L/11)
- Notions: tapestry needle, stitch markers, measuring tape, scissors
- Finished size: XS (S, M, L, XL, 2XL, 3XL) to fit bust 30-32 (34-36, 38-40, 42-44, 46-48, 50-52, 54-56) in; body circumference approx 36 (40, 44, 48, 52, 56, 60) in; length 24 (25, 26, 27, 28, 29, 30) in; hood height approx 13 in
Abbreviations
- ch – chain
- sc – single crochet
- hdc – half double crochet
- dc – double crochet
- sl st – slip stitch
- sc2tog – single crochet two stitches together (a decrease)
- st(s) – stitch(es)
- RS – right side (the outside of the fabric)
Gauge
12 sts and 8 rows = 4 in (10 cm) in half double crochet, blocked. Work a small swatch in hdc, block it lightly, and measure a 4 in section in the middle to check your stitch and row counts before starting.
Tips Before You Start
- Work in turned rows throughout. The ch 2 at the start of hdc rows and the ch 1 at the start of sc rows do not count as stitches.
- Keep the stripe sequence steady: 4 rows Color A, 2 rows Color B, repeating through both the body and the hood. Carry the unused color loosely up the side edge rather than cutting it each time.
- The body is worked flat and seamed, so check the length against your own measurement as you go rather than relying only on row counts.
- Mark the first and last stitch of every hood row with a stitch marker so the paired increases and decreases stay perfectly symmetrical.
Step-by-Step Instructions
Body (worked flat, then seamed into a tube)
With Color A, ch 108 (120, 132, 144, 156, 168, 180).
Row 1: hdc in 3rd ch from hook, hdc to end (106 (118, 130, 142, 154, 166, 178) sts).
Rows 2-4: ch 2, turn, hdc across (106 (118, 130, 142, 154, 166, 178) sts).
Change to Color B.
Rows 5-6: ch 2, turn, hdc across (106 (118, 130, 142, 154, 166, 178) sts).
Change to Color A.
Rows 7-10: ch 2, turn, hdc across (106 (118, 130, 142, 154, 166, 178) sts).
Repeat: Continue the stripe sequence (4 rows A, 2 rows B) until the body measures 24 (25, 26, 27, 28, 29, 30) in, ending after a 4-row Color A stripe. Fasten off, leaving a 24 in tail.
Body Assembly
Fold the body in half widthwise with RS together. Whipstitch or sc seam the two short side edges for 8 (8, 8, 9, 9, 9, 10) in from the bottom, leaving the remaining top edge open for armholes. Turn RS out.
Hood (folded triangle, worked flat)
With Color A, ch 2.
Row 1: 3 sc in 2nd ch from hook (3 sts).
Row 2: ch 1, turn, 2 sc in first sc, sc in next sc, 2 sc in last sc (5 sts).
Row 3: ch 1, turn, 2 sc in first sc, sc to last sc, 2 sc in last sc (7 sts).
Rows 4-24: Repeat Row 3, increasing 1 st at each end every row and following the stripe sequence (4 rows A, 2 rows B), until 45 sc. Fasten off Color A.
Row 25: Change to Color B, ch 1, turn, sc across (45 sts).
Row 26: ch 1, turn, sc2tog, sc to last 2 sc, sc2tog (43 sts).
Rows 27-44: Repeat Row 26, decreasing 1 st at each end every row and following the stripe sequence, until 9 sc. Fasten off.
Hood Assembly
Fold the hood in half along the center increase line with RS together. Whipstitch the two long slanted edges together from point to base, leaving the 45-st base open. Turn RS out. Pin the base of the hood to the top opening of the body, matching the center back of the hood to the center back of the body and distributing the stitches evenly. Whipstitch or sc the base to the body top edge. Fasten off.
Scalloped Hood Edging (Color B)
With RS facing, join Color B at the bottom right corner of the hood opening.
Rnd 1: ch 1, sc evenly around the entire hood opening (approx 60 sc). Join with sl st to first sc.
Rnd 2: ch 1, *skip 1 sc, 5 dc in next sc, skip 1 sc, sl st in next sc; repeat from * around, adjusting the final repeat to end with a sl st. Fasten off.
Bottom Hem Edging (Color B)
With RS facing, join Color B at the side seam of the bottom edge.
Rnd 1: ch 1, sc evenly around the bottom edge (106 (118, 130, 142, 154, 166, 178) sc). Join with sl st.
Rnd 2: ch 1, *skip 1 sc, 5 dc in next sc, skip 1 sc, sl st in next sc; repeat from * around. Fasten off.
Assembly and Finishing
Weave in all ends on the wrong side, taking care to secure the carried stripe colors along the side seams. Block lightly to the finished measurements, pinning the scalloped edges flat so the shells open up. Optional: add a 24 in twisted cord or a ch 60 tie at the hood base.
Pro Tips and Variations
- Swap the stripe sequence for a solid body with an ivory hood and edging for a quieter, more minimal look.
- Work the body in one continuous color and add a contrasting scalloped hem for a faster, yarn-saving version.
- Add a ch 60 tie in Color B at the hood base so the hood can be drawn in on breezy days.