Butter & White Chevron Crochet Crop Vest Free Pattern
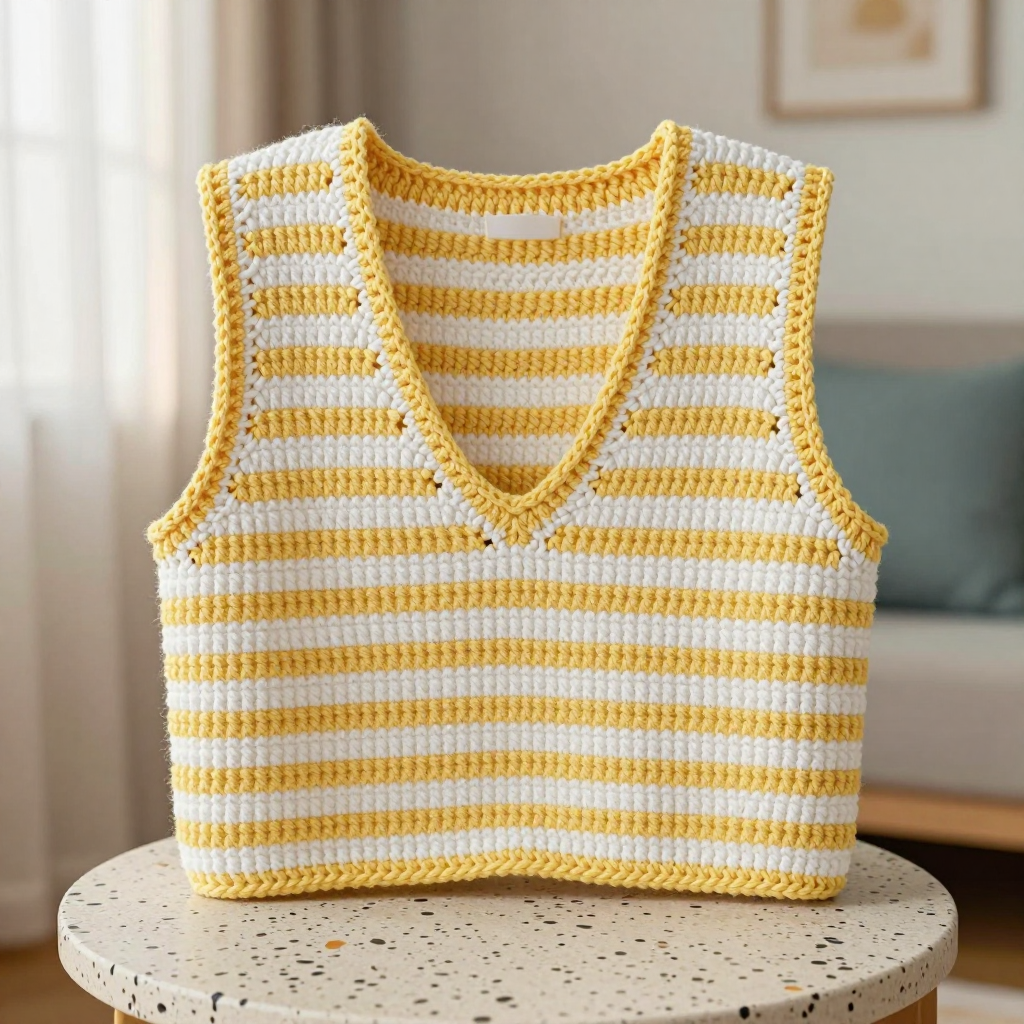
Butter & White Chevron Crochet Crop Vest Free Pattern
Introduction
This butter-and-white chevron crop vest is a gentle, easygoing project made for anyone who wants a wearable first garment without complicated shaping. It's worked as two identical flat rectangles, so there are no armhole decreases, no neckline math, and no fiddly pieces to keep track of. The soft bulky cotton gives it a light, breathable drape that feels lovely over a tank or tee, and the alternating two-row stripes add just enough interest to keep your hook happy. The finished look is calm and Japandi-inspired: clean lines, a simple single-crochet edging, and a chevron texture that reads as subtle rather than busy.
Materials Needed
- Yarn: Bulky (5) weight cotton blend, 100 g / 120 yd per skein. Color A (butter yellow): 2 skeins. Color B (white): 1 skein.
- Hook: 6 mm (US J/10), or the size needed to match gauge.
- Notions: Tapestry needle for seaming and weaving in ends, stitch markers, measuring tape, scissors.
- Finished size: Fits size S/M. Each panel measures 18 inches wide and 16 inches long.
Abbreviations
- ch — chain: make a loop of yarn and pull it through the loop on your hook.
- sc — single crochet: insert hook in stitch, yarn over, pull up a loop, yarn over, pull through both loops.
- sk — skip: leave the stated number of stitches unworked.
- st(s) — stitch(es).
- sl st — slip stitch: insert hook, yarn over, pull through both the stitch and the loop on your hook.
- rep — repeat.
Gauge
12 stitches and 8 rows = 4 inches in the chevron pattern. Work a small swatch and measure across the middle of it; if you have more stitches than 12, go up a hook size, and if you have fewer, go down.
Tips Before You Start
- Count your peaks. Each chevron repeat has a 3-sc peak and a sk-2 valley. If your stitch count drifts, check that every peak has three stitches and every valley skips two.
- Keep the edges straight. The first 3 and last 4 stitches of every row are plain sc, which keeps the side edges tidy for seaming. Don't add extra stitches there.
- Change colors on the last stitch. Finish the final sc of a row with the new color so the stripe line stays crisp.
- Make both panels the same. Work the Front and Back one after the other and compare them as you go so the stripes line up at the seams.
Step-by-Step Instructions
Back Panel (make 1)
With color A, ch 56.
Row 1: Sc in 2nd ch from hook, sc in next 2 ch, *3 sc in next ch, sc in next 3 ch, sk 2 ch, sc in next 3 ch, 3 sc in next ch; rep from * to last 4 ch, sc in last 4 ch (56 sts).
Row 2: Ch 1, turn, sc in first 3 sts, *3 sc in next st, sc in next 3 sts, sk 2 sts, sc in next 3 sts, 3 sc in next st; rep from * to last 4 sts, sc in last 4 sts (56 sts).
Rows 3–4: Rep Row 2 (56 sts). Change to B.
Rows 5–6: Rep Row 2 (56 sts). Change to A.
Rows 7–8: Rep Row 2 (56 sts). Change to B.
Rows 9–10: Rep Row 2 (56 sts). Change to A.
Rows 11–12: Rep Row 2 (56 sts). Change to B.
Rows 13–14: Rep Row 2 (56 sts). Change to A.
Rows 15–16: Rep Row 2 (56 sts). Change to B.
Rows 17–18: Rep Row 2 (56 sts). Change to A.
Rows 19–20: Rep Row 2 (56 sts). Change to B.
Rows 21–22: Rep Row 2 (56 sts). Change to A.
Rows 23–24: Rep Row 2 (56 sts). Change to B.
Rows 25–26: Rep Row 2 (56 sts). Change to A.
Rows 27–28: Rep Row 2 (56 sts). Change to B.
Rows 29–30: Rep Row 2 (56 sts). Change to A.
Rows 31–32: Rep Row 2 (56 sts). Fasten off.
Front Panel (make 1)
Work exactly as for the Back Panel, from Row 1 through Row 32, ending on color A. Fasten off.
Armhole Edging (work on both panels)
With A, join yarn at the underarm edge of one armhole opening. Sc evenly around the armhole opening, working one sc in each row end along the sides and one sc in each stitch along the top edge, keeping the stitches flat and even. Sl st to join. Fasten off. Rep for the other armhole on the same panel, then work both armhole edgings on the second panel.
Neck Edging (work on both panels)
With A, join yarn at the neck edge. Sc evenly around the neck opening, working one sc in each stitch or row end along the edge. Sl st to join. Fasten off. Rep on the second panel.
Assembly and Finishing
Place the Back and Front panels with right sides together, matching stripes and edges. Sew the shoulder seams from each outer edge inward, leaving the center 6 inches open for the neck. Sew the side seams from the bottom edge upward, leaving the top 6 inches open on each side for the armholes. Try the vest on before weaving in ends to check the openings, adjusting the seams if needed. Weave in all ends neatly on the wrong side, working them along the stripe of the same color. Block lightly: mist the vest, pat it flat to the finished measurements (18 inches wide, 16 inches long per panel), and let it dry completely.
Pro Tips and Variations
- Make it longer: Add extra two-row stripe bands before the final row to turn the crop into a hip-length vest; each extra pair of rows adds about 1 inch.
- Change the palette: Swap butter yellow for sage or clay and keep white as the contrast for a different Japandi mood.
- Widen the neck: Leave 8 inches open at the center of the shoulder seams instead of 6 for a wider boat neck, or add a second sc round to the edgings for a more defined finish.


