Velvet Ribbon Tic Tac Toe Pouch Set Free Crochet Pattern
Introduction
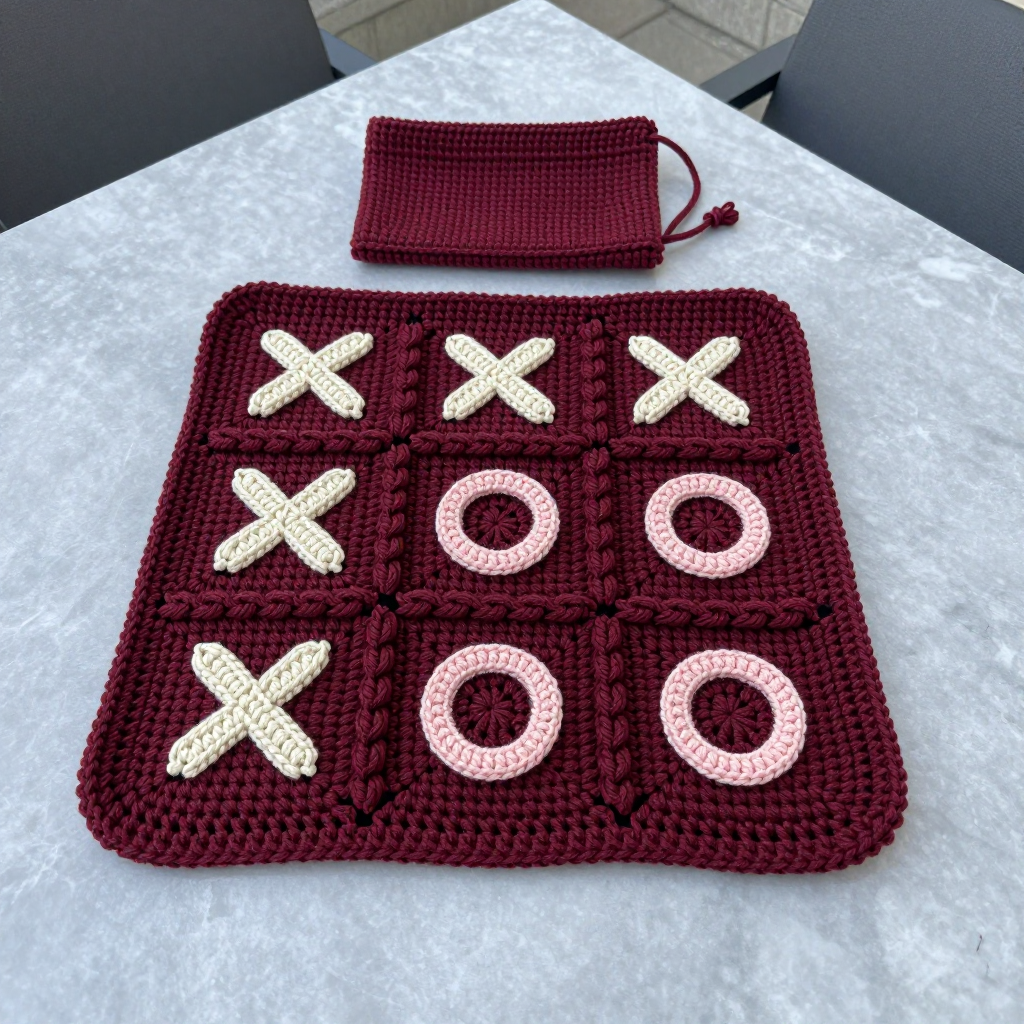
This Victorian-inspired tic tac toe set is a sweet little project that looks far more intricate than it is. The burgundy grid is a simple single-crochet square, and the raised chain "ribbon" lines sewn on top give it that delicate, antique-parlor charm. The cream X's and rose O's are quick, satisfying makes that come together in minutes, and the matching drawstring pouch keeps everything tidy for travel or gifting. It's a wonderful beginner project, a lovely handmade gift, and a game the whole family can actually play.
Materials Needed
- Yarn: Worsted weight (4) acrylic or cotton — burgundy (A) 150 yd, cream (B) 50 yd, rose (C) 50 yd
- Hook: 5.5 mm (I/9)
- Notions: Tapestry needle, scissors, pins (for the grid strips)
- Finished size: Grid 6" x 6" (15 cm x 15 cm); X and O markers 2" (5 cm) across; pouch 7" x 5" (18 cm x 13 cm)
Abbreviations
- ch — chain
- sc — single crochet
- sc2tog — single crochet two stitches together (a decrease)
- sl st — slip stitch
- sk — skip
- sp — space
- st(s) — stitch(es)
Gauge
14 sc x 16 rows = 4 inches (10 cm). Work a small swatch in single crochet and measure a 4-inch section; adjust your hook if needed so your grid finishes at 6" x 6".
Tips Before You Start
- Keep your single crochet even and relaxed — tight stitches make the grid stiff and hard to pin the chain strips onto.
- Pin all four chain strips in place before sewing so the nine cells come out evenly spaced.
- Use a contrasting scrap of yarn as a stitch marker at the start of each pouch round so you don't lose your place.
- Block the grid square flat before sewing on the strips so the finished board lies perfectly even.
Step-by-Step Instructions
Grid (Color A)
Ch 22.
R1: Sc in 2nd ch from hook and each ch across (21 sts).
R2-24: Ch 1, turn, sc in each st across (21 sts).
Fasten off.
Grid Lines (Color A)
Make 4 ch-21 strips. Pin two strips vertically and two horizontally onto the front of the grid to form a 3x3 grid, spacing them evenly. Sew in place with A.
Markers X (Color B) — make 5
Ch 2.
R1: 3 sc in 2nd ch from hook (3 sts).
R2: Ch 1, turn, sc in each st (3 sts).
R3: Ch 1, turn, sc2tog, sc (2 sts).
R4: Ch 1, turn, sc2tog (1 st).
Fasten off. Make 5.
Markers O (Color C) — make 5
Ch 4, join with sl st to form a ring.
R1: Ch 1, 8 sc in ring, join with sl st (8 sts).
R2: Ch 1, 2 sc in each st around, join with sl st (16 sts).
Fasten off. Make 5.
Pouch (Color A)
Ch 31.
R1: Sc in 2nd ch from hook and each ch across (30 sts).
R2-20: Ch 1, turn, sc in each st across (30 sts).
Fasten off. Fold in half and sew the side seams with A.
Pouch Edging (Color A)
Join A at the top edge.
R1: Ch 1, sc evenly around the top (30 sts).
R2: Ch 1, [sc in next 3 sts, ch 1, sk 1] around, join with sl st.
R3: Ch 1, sc in each st and ch-1 sp around, join with sl st.
Fasten off.
Drawstring (Color A)
Ch 40. Sl st in each ch across. Weave through the ch-1 spaces of the edging and tie the ends.
Assembly and Finishing
Weave in all ends with the tapestry needle. Block the grid square flat and shape the markers lightly so they lie even. Place the five X and five O markers inside the pouch and pull the drawstring closed. Your set is ready to play or gift.
Pro Tips and Variations
- Swap the colors for a holiday set — red and green for Christmas, or pastel shades for a nursery gift.
- Make the X's and O's in two clearly contrasting colors so the game is easy to read at a glance.
- Add a small button or bead to the drawstring ends for a polished, Victorian finish.