Moss Stitch Blackened Hobo: Free Crochet Pattern
Introduction
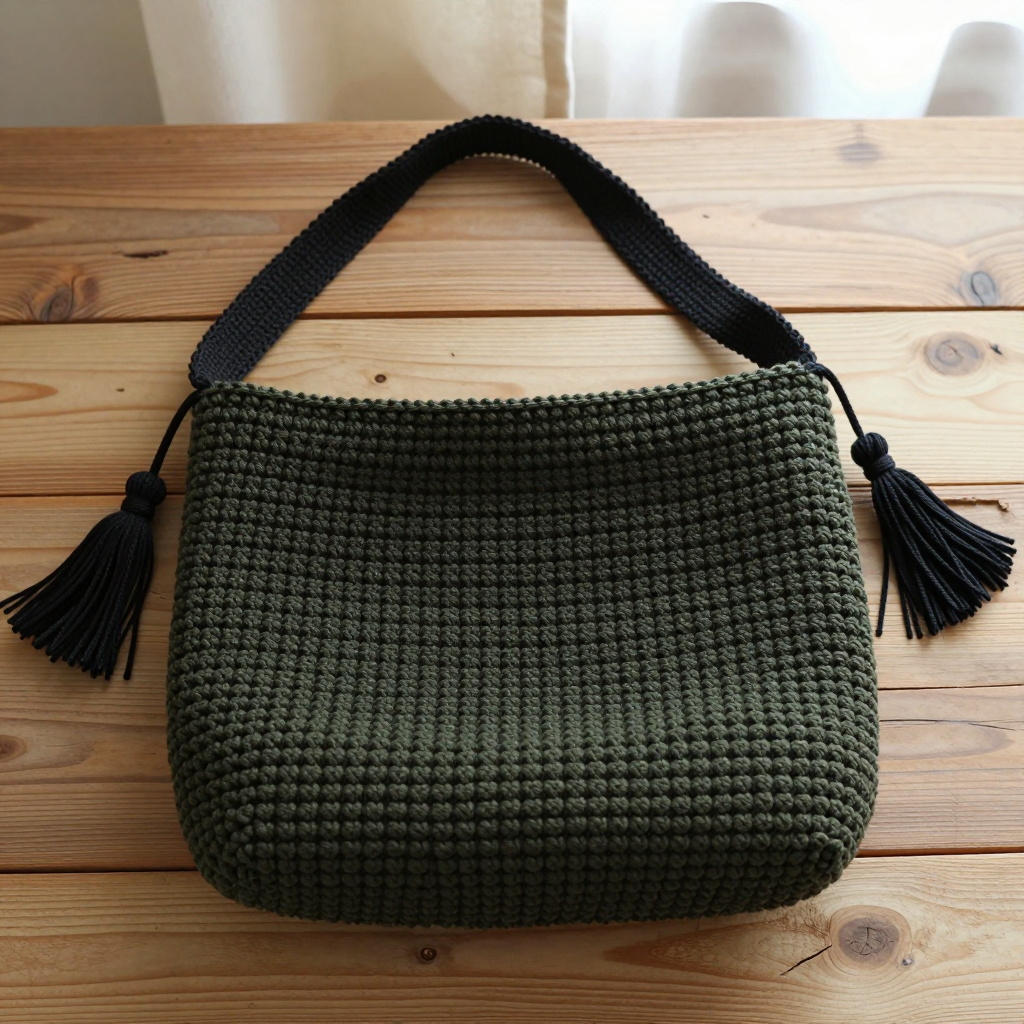
The Moss Stitch Blackened Hobo is a beginner-friendly crochet bag with a moody, grunge-inspired look. It is made from one simple rectangle of moss stitch, seamed into a tube with a softly rounded bottom, so you only need to master single crochet and chain one. The dark olive-black yarn gives it a deep, almost-black tone, while the narrow black strap and frayed yarn tassel add a little edge. The finished fabric is dense and squishy, perfect for everyday use, and the whole bag works up quickly with just a few hundred yards of worsted weight yarn.
Materials Needed
- Yarn: Worsted weight (category 4) acrylic or cotton blend, approximately 300 yards total:
- Color A (dark olive-black): 250 yards
- Color B (black): 50 yards for strap and tassel
- Hook: 6.5 mm (K-10.5) crochet hook
- Notions: Yarn needle, scissors, stitch marker (optional)
- Finished size: Approx. 14 inches wide x 12 inches tall (excluding strap), with a 20-inch strap drop
Abbreviations
- ch — chain
- sc — single crochet
- sp / sps — space / spaces
- st / sts — stitch / stitches
- rep — repeat
- sl st — slip stitch
- rnd — round
- A / B — color A (dark olive-black) / color B (black)
Gauge
12 stitches and 12 rows = 4 inches in moss stitch. To check, crochet a small swatch in moss stitch and measure a 4-inch section; adjust your hook size if needed to match.
Tips Before You Start
- Keep your chain-1 spaces loose and even so the moss stitch texture stays consistent and the bag does not pull in.
- Count your stitches at the end of each row: you should always have 22 sc and 21 ch-1 spaces across the body.
- Work the body rectangle until it measures 24 inches, since this length folds in half to make the 12-inch-tall bag.
- Leave the full 20-inch tail when you fasten off the body; it makes seaming the side much easier.
Step-by-Step Instructions
Bag Body (Color A)
Row 1: Ch 44. Sc in 2nd ch from hook, *ch 1, skip 1 ch, sc in next ch; rep from * across, turn (22 sc, 21 ch-1 sps).
Row 2: Ch 1, sc in first sc, *ch 1, skip ch-1 sp, sc in next sc; rep from * across, turn (22 sc, 21 ch-1 sps).
Rows 3–72: Rep Row 2 until piece measures 24 inches from beginning (22 sc, 21 ch-1 sps per row).
Fasten off, leaving a 20-inch tail for seaming.
Seaming
Fold the rectangle in half widthwise to form a tube, with right sides together. Whipstitch or single crochet seam the short edges together to form a tube. Then seam the bottom edge closed, rounding the corners by folding them inward and stitching across.
Strap (Color B)
Row 1: Ch 4. Sc in 2nd ch from hook and in each ch across (3 sc).
Row 2: Ch 1, turn, sc in each sc across (3 sc).
Rows 3–40: Rep Row 2 until strap measures 40 inches (3 sc per row).
Fasten off. Attach strap ends to the inside of the bag at the side seams, 2 inches down from the top edge, using the yarn needle and color B.
Tassel (Color B)
Cut 20 strands of B, each 12 inches long. Fold in half and attach to the bag at one side seam, 1 inch down from the top edge, using a lark's head knot. Wrap a 6-inch length of B around the tassel 1 inch below the fold to secure, and trim the ends evenly.
Edging (Color A)
Rnd 1: With A, join yarn at the top edge of the bag. Sc evenly around the top edge, join with sl st to first sc. Fasten off.
Assembly and Finishing
Use the 20-inch tail from the body to seam the short edges and the bottom, working with right sides together so the seam sits inside the finished bag. Attach the strap ends securely at the side seams, 2 inches below the top edge, stitching back and forth a few times for strength. Weave in all remaining ends, then block lightly by misting the bag and shaping it flat to dry, keeping the rounded bottom and strap drop even.
Pro Tips and Variations
- Use a cotton blend for a sturdier bag that holds its shape, or acrylic for a softer, lighter feel.
- Make the strap longer for a crossbody fit, or double the strap width for a chunkier look.
- Add a second tassel at the opposite side seam, or swap color B for a deep charcoal for a softer grunge effect.