Granny Square Mouse Ornament Free Crochet Pattern
Granny Square Mouse Ornament Free Crochet Pattern
Introduction
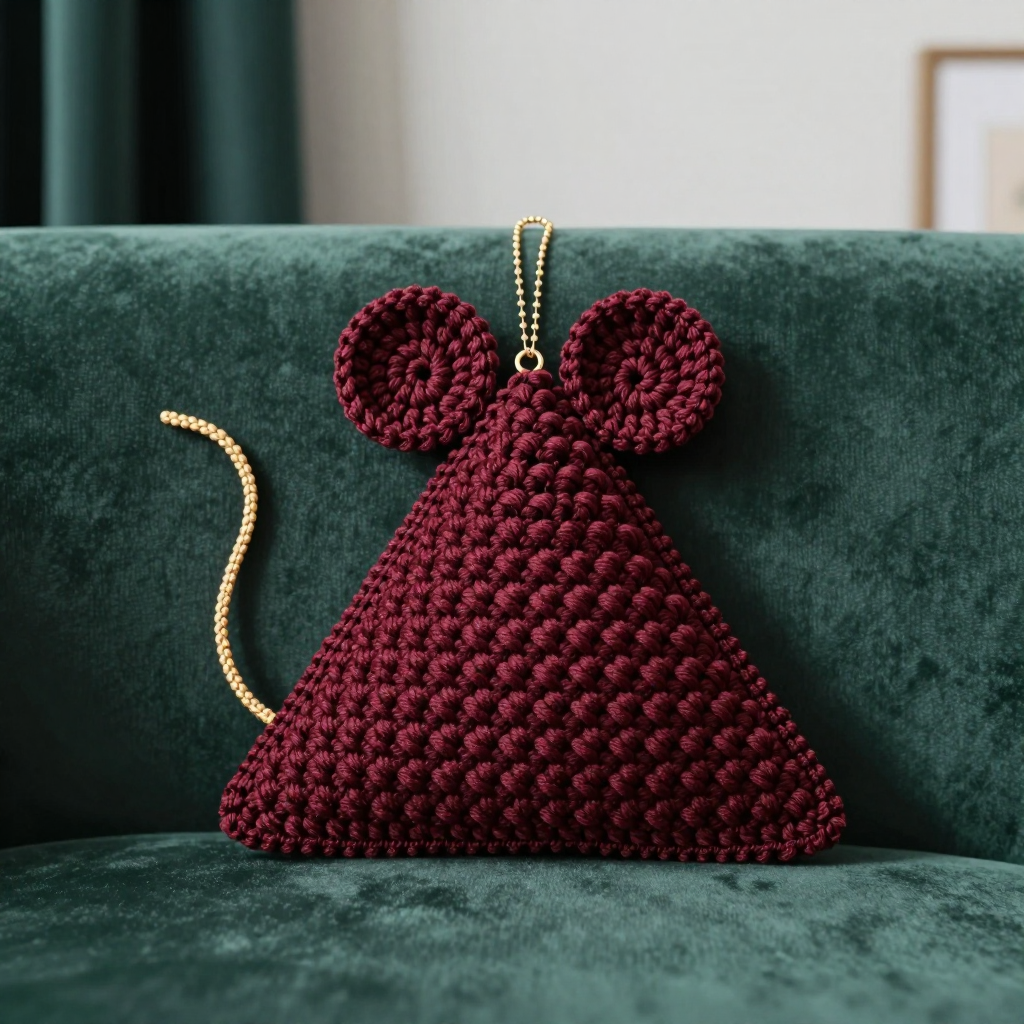
This little velvet mouse is the perfect quick project for anyone who loves granny squares but wants to use them in a fresh, playful way. A single burgundy square is folded and seamed into a soft triangular body, then finished with tiny round ears, a gold slip-stitch tail, and a matching gold hanging loop for a Y2K-inspired look. The velvet yarn gives it a plush, slightly fuzzy texture that feels lovely in the hand and catches the light in a rich, jewel-toned way. At about 4 inches long, it works up in an evening and makes a charming ornament, gift topper, or small handmade keepsake.
Materials Needed
- Yarn: Worsted weight velvet yarn (100% polyester, approx. 100 yds/50g) — 30 yds burgundy (Color A), 20 yds gold (Color B)
- Hook: 4.0 mm (US G-6)
- Notions: Tapestry needle, scissors, small amount of fiberfill stuffing, stitch marker (optional)
- Finished size: Approx. 4 in (10 cm) long, 2.5 in (6 cm) wide, 1.5 in (4 cm) tall
Abbreviations
- ch — chain
- sl st — slip stitch
- sc — single crochet
- dc — double crochet
- sp — space
- st(s) — stitch(es)
- rep — repeat
Gauge
1 granny square = 3.5 in (9 cm) square after blocking. Work the square first and measure it flat; if it is larger or smaller than 3.5 in, adjust your hook size up or down so the finished mouse comes out at the right size.
Tips Before You Start
- Velvet yarn has a nap, so keep your tension relaxed and avoid pulling tight — the pile can make stitches harder to see, so feel for the stitch posts rather than relying on sight alone.
- Count your clusters at the end of each round; each granny round should add 12 dc so the square stays flat and even.
- Stuff the body only lightly — overstuffing will round out the triangular wedge shape and lose the pointed nose.
- Pin the ears and tail in place before sewing so you can check the placement and symmetry first.
Step-by-Step Instructions
Granny Square (make 1, with Color A)
Set-up: Ch 4, join with sl st to form a ring.
R1: Ch 3 (counts as dc), 2 dc in ring, [ch 2, 3 dc in ring] 3 times, ch 2, join with sl st to top of ch-3 (12 dc, 4 ch-2 sps).
R2: Ch 3, 2 dc in same sp, [ch 2, 3 dc in next ch-2 sp] 3 times, ch 2, join with sl st to top of ch-3 (24 dc, 4 ch-2 sps).
R3: Ch 3, 2 dc in same sp, ch 2, 3 dc in same sp, *3 dc in next ch-2 sp, [3 dc, ch 2, 3 dc] in next ch-2 sp; rep from * 2 more times, 3 dc in last ch-2 sp, join with sl st to top of ch-3 (36 dc, 4 ch-2 sps).
R4: Ch 1, sc in each dc around, working 3 sc in each ch-2 sp, join with sl st to first sc (48 sc). Fasten off. Weave in ends.
Ears (make 2, with Color A)
Set-up: Ch 2.
R1: 6 sc in second ch from hook, join with sl st to first sc (6 sc).
R2: Ch 1, 2 sc in each sc around, join with sl st to first sc (12 sc).
Fasten off, leaving a long tail for sewing.
Tail (with Color B)
Row 1: Ch 12, sl st in second ch from hook and each ch across (11 sl sts).
Fasten off, leaving a long tail for sewing.
Hanging Loop (with Color B)
Rnd 1: Ch 6, join with sl st to form ring, sl st in each ch around (6 sl sts).
Fasten off, leaving a tail for sewing.
Assembly and Finishing
Fold the granny square in half diagonally to form a triangle. Whipstitch the two straight edges together, leaving a 1-inch opening at the pointed end for stuffing. Stuff lightly with fiberfill, then sew the opening closed. The folded edge forms the mouse's back; the pointed end is the nose.
Sew the ears to the top of the head near the folded edge, one on each side. Sew the tail to the back at the folded edge. Sew the hanging loop to the top center of the mouse's back.
Weave in all remaining ends. Block lightly to shape, using pins to hold the ears and tail in place while the piece dries.
Pro Tips and Variations
- Swap the gold for a metallic silver or cream yarn for a different color story, or make the ears in Color B for a two-tone look.
- Add a tiny embroidered nose or a few whisker stitches with sewing thread if you want a little more character.
- Make a set in different color combinations and hang them together as a garland or gift toppers.